BraineyBites Alpha Map Generator
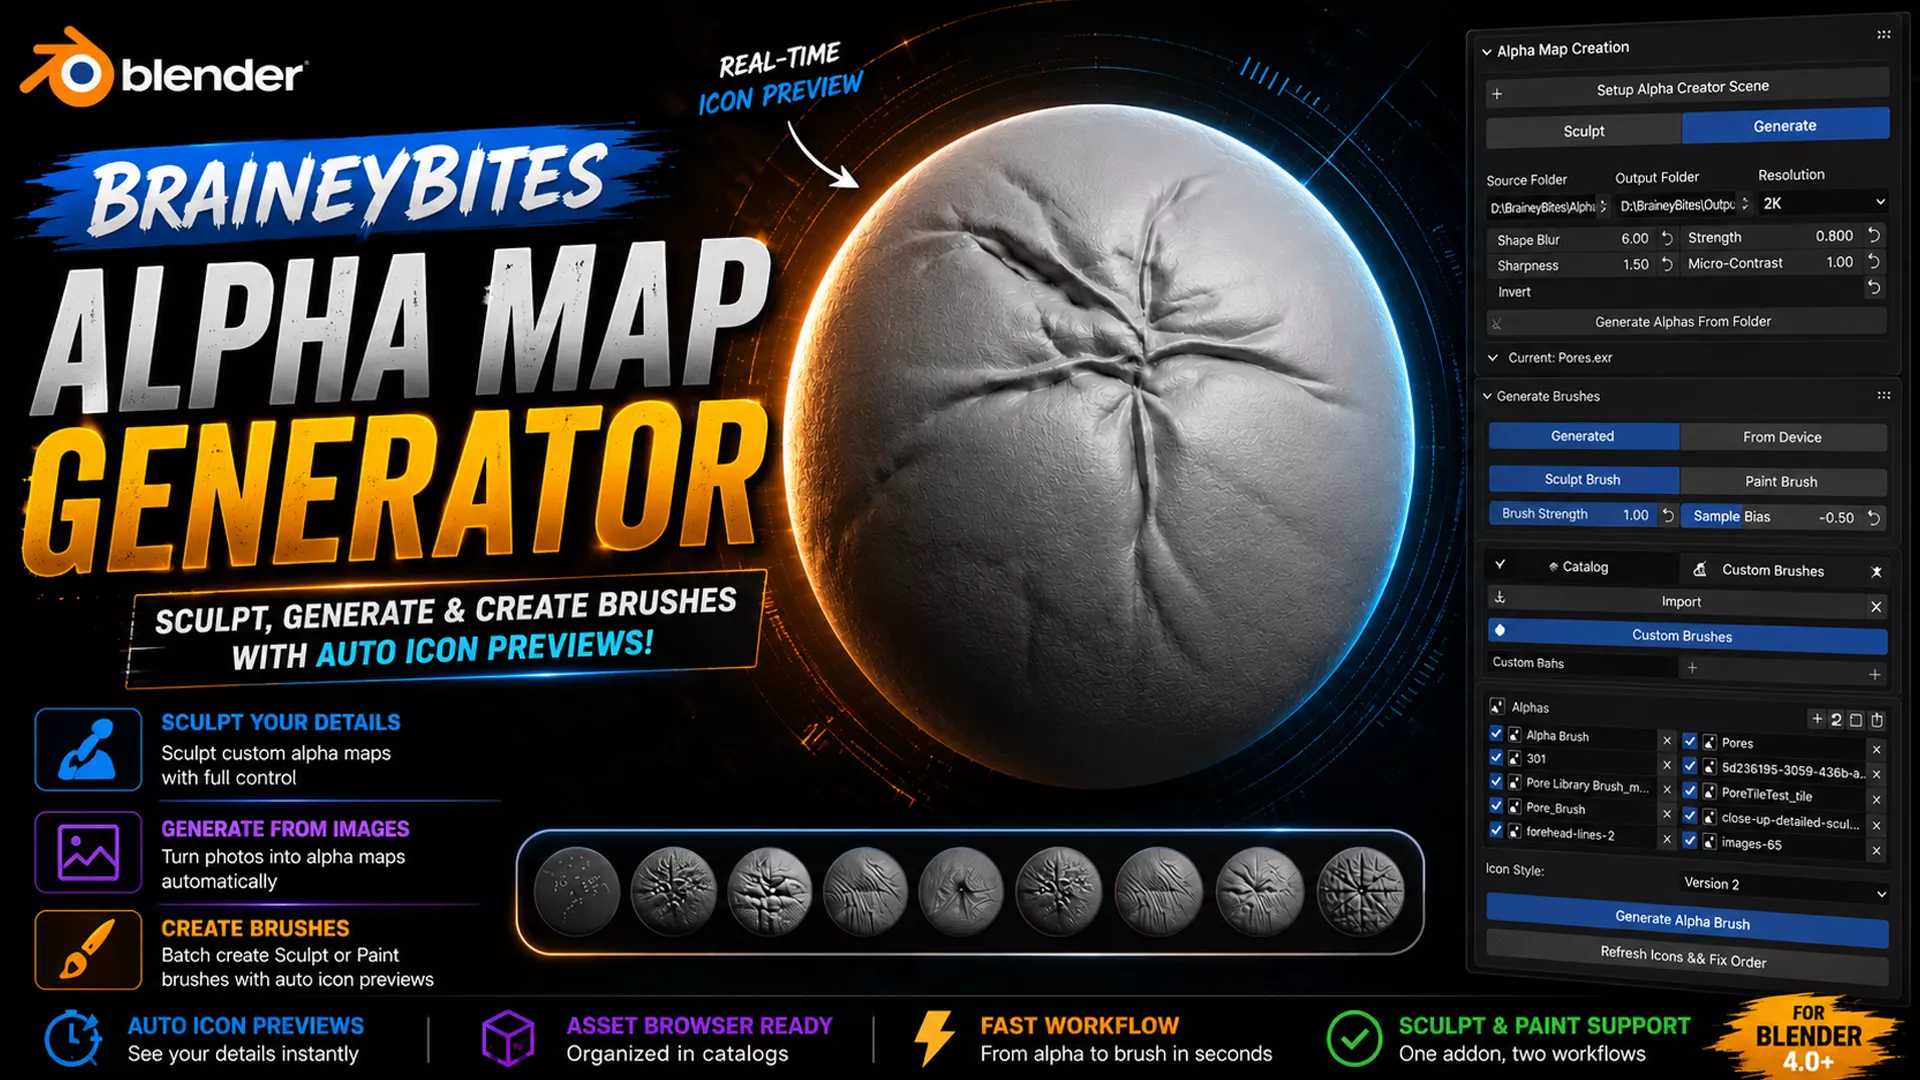
About this pluginBraineyBites Alpha Map Generator is a Blender add-on that takes the guesswork out of building custom detail brushes. Sculpt a bit of surface detail (wrinkles, pores, cracks, whatever) on a flat plane, or point it at a folder of reference photos, and it turns that into a proper alpha map -- then batch-converts your whole library of alphas into ready-to-use Sculpt or Paint brush assets, complete with an automatically rendered preview icon for each one, filed into your own Asset Browser catalog. Built for anyone who wants a real pipeline for making brushes instead of hand-rolling each one.
What this addon doesSculpt or generate detail alpha maps, then batch-turn them into ready-to-use Sculpt or Paint brushes -- complete with an auto-rendered preview icon for each one.
Recommended Blender versionBlender 4.0 or newer. Built and tested primarily on Blender 5.2 LTS. Anything in the 4.x or 5.x line should work -- the add-on relies on the modern Brush Asset system (Sculpt/Paint brushes as proper Asset Browser entries with catalogs), which needs Blender 4.0 or later.
Installing
Open Blender.
Edit > Preferences > Get Extensions or Add-ons (either tab works for installing from a file).
Click the dropdown arrow near the top-right (or the ▾ next to Install from Disk depending on your Blender version) and choose Install from Disk.
Pick the .zip file.
Make sure the checkbox next to the addon's name is ticked to enable it.Once installed, you'll find it in the 3D Viewport's sidebar (press N if the sidebar isn't showing) under a tab named “Alpha Creator.”Note: If you ever see a small red error popup mentioning “_RestrictData” right after installing, it's harmless and already handled -- it can happen for a split second while Blender is still starting up, before it even reaches your file. The addon itself will have installed and be working correctly regardless.
The two sectionsEverything lives in one sidebar tab, split into two collapsible sections. Section names have no numbers -- just click the triangle next to a section's name to expand or collapse it.
5.1 Alpha Map CreationThis is where you make the actual detail alpha (the black-and-white height map a brush uses).
- ● Sculpt: hand-sculpt your own detail.
- ● Click Setup Alpha Creator Scene -- this adds a camera and a flat, sculptable plane with locked edges.
- ○ Sculpt your detail directly on that plane, same as sculpting anything else in Blender.
- ○ Give it a Name, pick a Save Location (or leave blank to save into an “Alphas” folder next to your .blend file), pick a Resolution, then click Create Alpha Map. It bakes your sculpt into an EXR image and adds it to the Alphas list in the Generate Brushes section automatically.
- ● Generate: turn a folder of reference photos into alphas automatically instead.
- ● Point Source Folder at your photos and Output Folder at where the results should be saved.
- ○ Shape Blur, Strength, Sharpness, and Micro-Contrast control how the detail gets extracted -- start with the defaults and nudge from there.
- ○ Click Generate Alphas From Folder. Every image in that folder gets converted and added to the Alphas list.
5.2 Generate BrushesTurns every alpha in your list into a ready-to-use brush asset, complete with its own preview icon.
- ● Source: Generated (alphas made in this session/this file) or From Device (point at a folder of alpha images you already have saved -- they load in as-is, no conversion).
- ● Brush Type: Sculpt Brush or Paint Brush -- this decides what kind of brush gets created, and also which icon color scheme is used (white detail for Sculpt, blue-tinted for Paint).
- ● Brush Strength / Sample Bias: baked into every brush this creates. Sample Bias only applies to Sculpt brushes.
- ● Catalog: which Asset Browser catalog new brushes get filed into.
Important: Before you create a catalog, you need an Asset Browser open somewhere in your workspace -- this is a Blender requirement, not something this addon can bypass. Easiest way: split the timeline (or any area) at the bottom of the screen and change its editor type (the icon in the top-left of that area) to Asset Browser. It doesn't need to be big or in any particular spot -- it just has to be open somewhere on screen.
- ● Import picks up whatever catalog is currently selected/highlighted inside that open Asset Browser -- click a real catalog there first, then Import.
- ● Create makes a brand-new catalog using the name you type, and switches future brushes to file into it. This also needs an Asset Browser open, for the same Blender-level reason.
- ● Alphas list: every alpha ready to become a brush.
- ● The checkbox on each row is Done. It's entirely manual -- checking it means “skip this one” on your next Generate Alpha Brush or Refresh Icons && Fix Order pass. Nothing ever checks it automatically for you.
- ● Uncheck an alpha to have it included again on the next pass.
- ● Icon Style: a dropdown below the Alphas list.
- ● Version 1 -- the alpha wrapped across the whole preview sphere.
- ● Version 2 -- alpha detail concentrated into a big soft patch toward one corner, the rest of the sphere left clean, with a slight raised bump under the detail -- closer to a “planet surface” look.
- ● Generate Alpha Brush: builds a brush for every UNCHECKED alpha in the list.
- ● Refresh Icons && Fix Order: re-renders the icon for every UNCHECKED alpha only -- checked ones keep their current icon untouched. This is how you can, for example, switch Icon Style to Version 2, leave just one alpha unchecked, and update only that one without touching the rest of your catalog.
- A typical first-time workflow
- Open Alpha Map Creation, click Setup Alpha Creator Scene, sculpt your detail, click Create Alpha Map.
- Open Generate Brushes. Make sure an Asset Browser is open somewhere on screen if you plan to use a custom catalog.
- Pick Brush Type (Sculpt or Paint), set Brush Strength/Sample Bias, pick or create a Catalog.
- Pick an Icon Style.
- Click Generate Alpha Brush.
- Check your new brush in the Asset Browser / Brush Asset shelf for that mode.