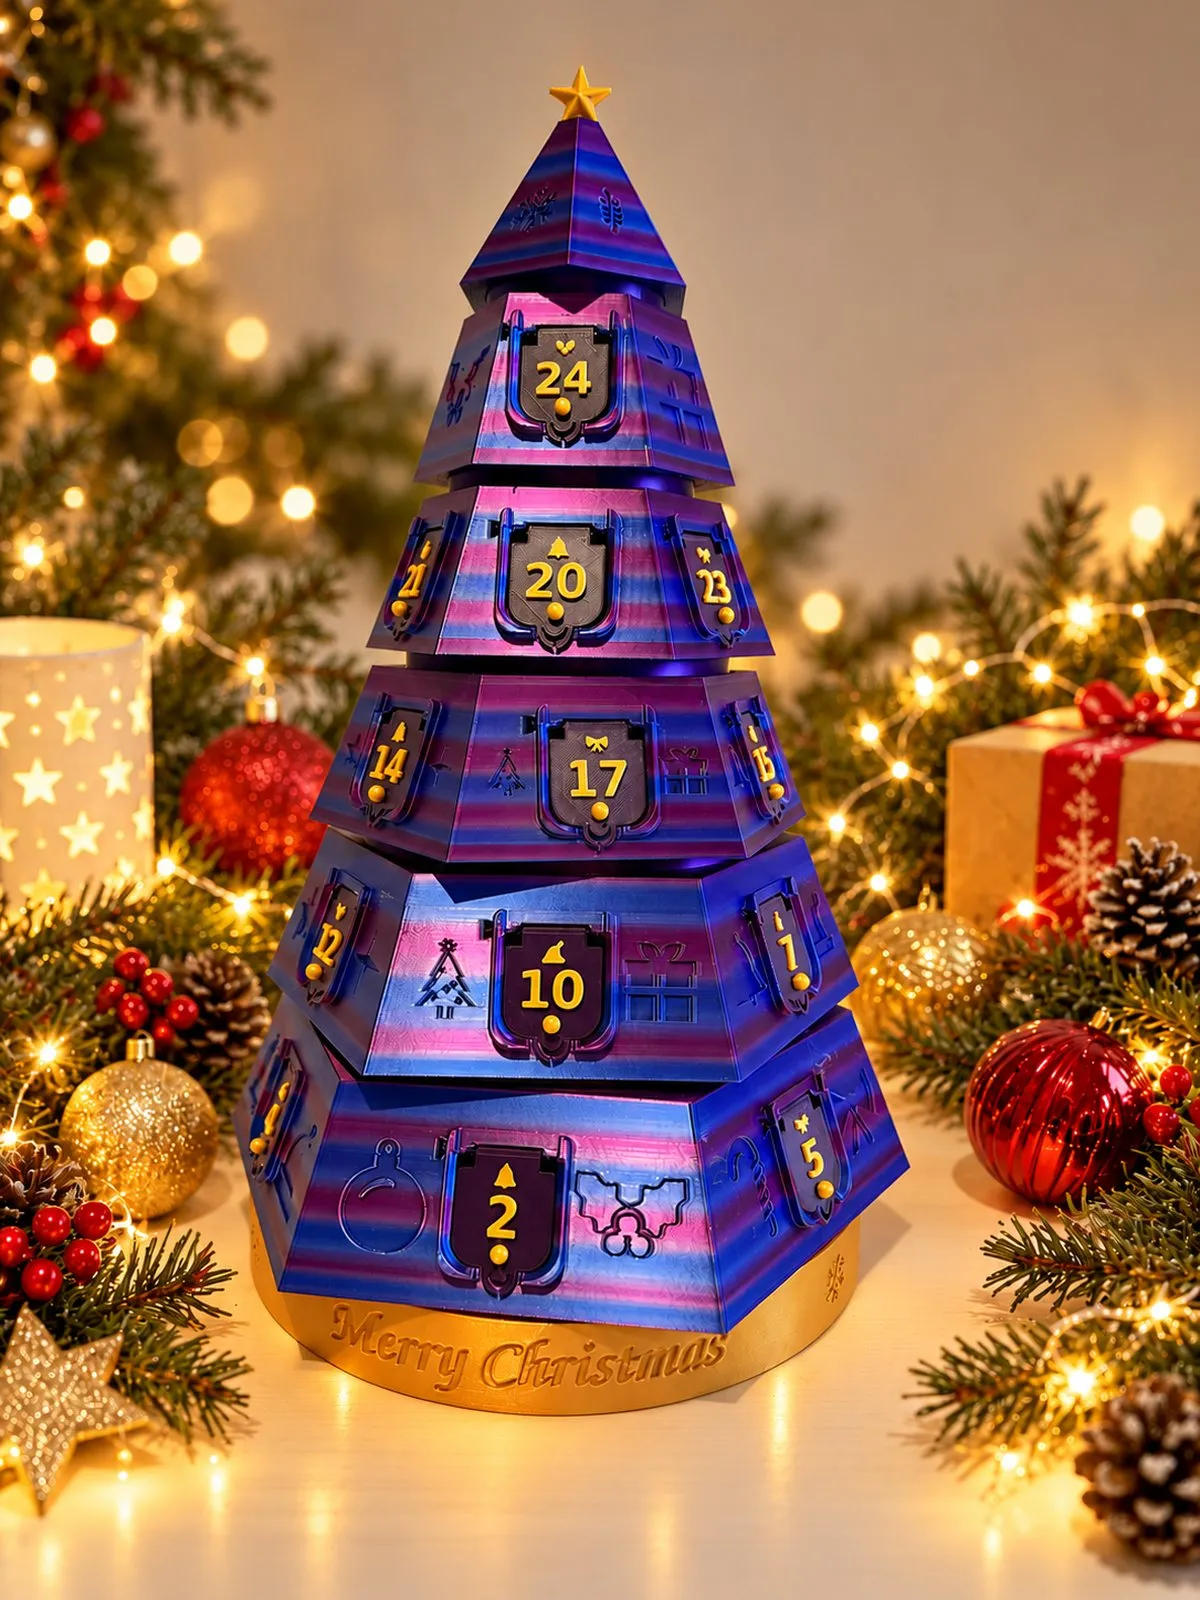
Twist the tree. Find the door. Count down to Christmas.
This is an advent calendar that makes you work for it, in a good way. Six faceted tiers stack into a tree about 400 mm tall with the star, and every level spins on its own roller bearing. You can't just read today's number off the front. You turn the tree like a puzzle, hunt down the door and pull it open.
What makes it special
- 24 hinged doors, numbered on the face, spread across five tiers
- Six tiers that each spin on their own roller bearing, plus a base that turns the whole tree
- A quarter-turn bayonet lock at every joint, so the tree stays together when you pick it up and every tier still spins freely
- 48 embossed Christmas motifs (snowflakes, trees, bells and more) that drop into engraved pockets in the tier walls, with single-piece files so you can pick your own colours
- Merry Christmas lettering on the base ring
- A two-part gold star that glues together and tabs into the tip
What's in the download (STL)
- Six tiers and the tip
- Base: outer ring, inner race plate, bearing cage, rollers and feet
- Five joint bearing cages and rollers
- All 24 doors on one plate, plus a two-door test plate for checking your hinge fit
- Star in two halves (easy) or one piece (needs supports)
- Embossed decoration plates for every tier, plus every motif as its own file
- Print and assembly guide with orientation, sizes, door numbering and a suggested print order
Print it
- Designed around a Bambu Lab H2S (340 x 320 mm bed). Any printer with a bed of at least 280 x 250 mm will do. The biggest part, the bottom tier, is 270 x 234 x 79.5 mm.
- PLA, 0.2 mm layers, 4 walls, 10-15% infill, 5-8 mm brim on the big flat parts
- Tiers, base and bearings need no supports
- Doors print face up with supports. For two-colour numbers, change filament at 4.40 mm.
- Rollers and decorations print at 0.12 mm
- Roughly 1 kg of filament for the whole tree. That's a rough estimate, not a sliced number, so check your slicer.
- You'll also need 24 offcuts of 1.75 mm filament for the hinge pins and a drop of super glue. Silicone or PTFE grease is optional, but your bearings will thank you.
Build it
Plan on about an hour once everything is printed, most of it pushing in those 24 hinge pins. You build from the bottom up. Each tier drops onto its bearing, then a quarter turn locks it on.
Good to know
- Print the door test plate first, then test-fit tiers 1 and 2 before you commit a few kilos of filament. The guide walks you through it.
- Printers vary, and the guide includes fit-tuning tips if a section runs tight or loose.
- Small parts (rollers, hinge pins, decorations, star halves) are a choking hazard. Not suitable for children under 3. Treat it as an adult-assembled decoration, not a toy.
- Colours are entirely up to you. File names carry no colour.
Designed and developed in Australia by The Qurated.