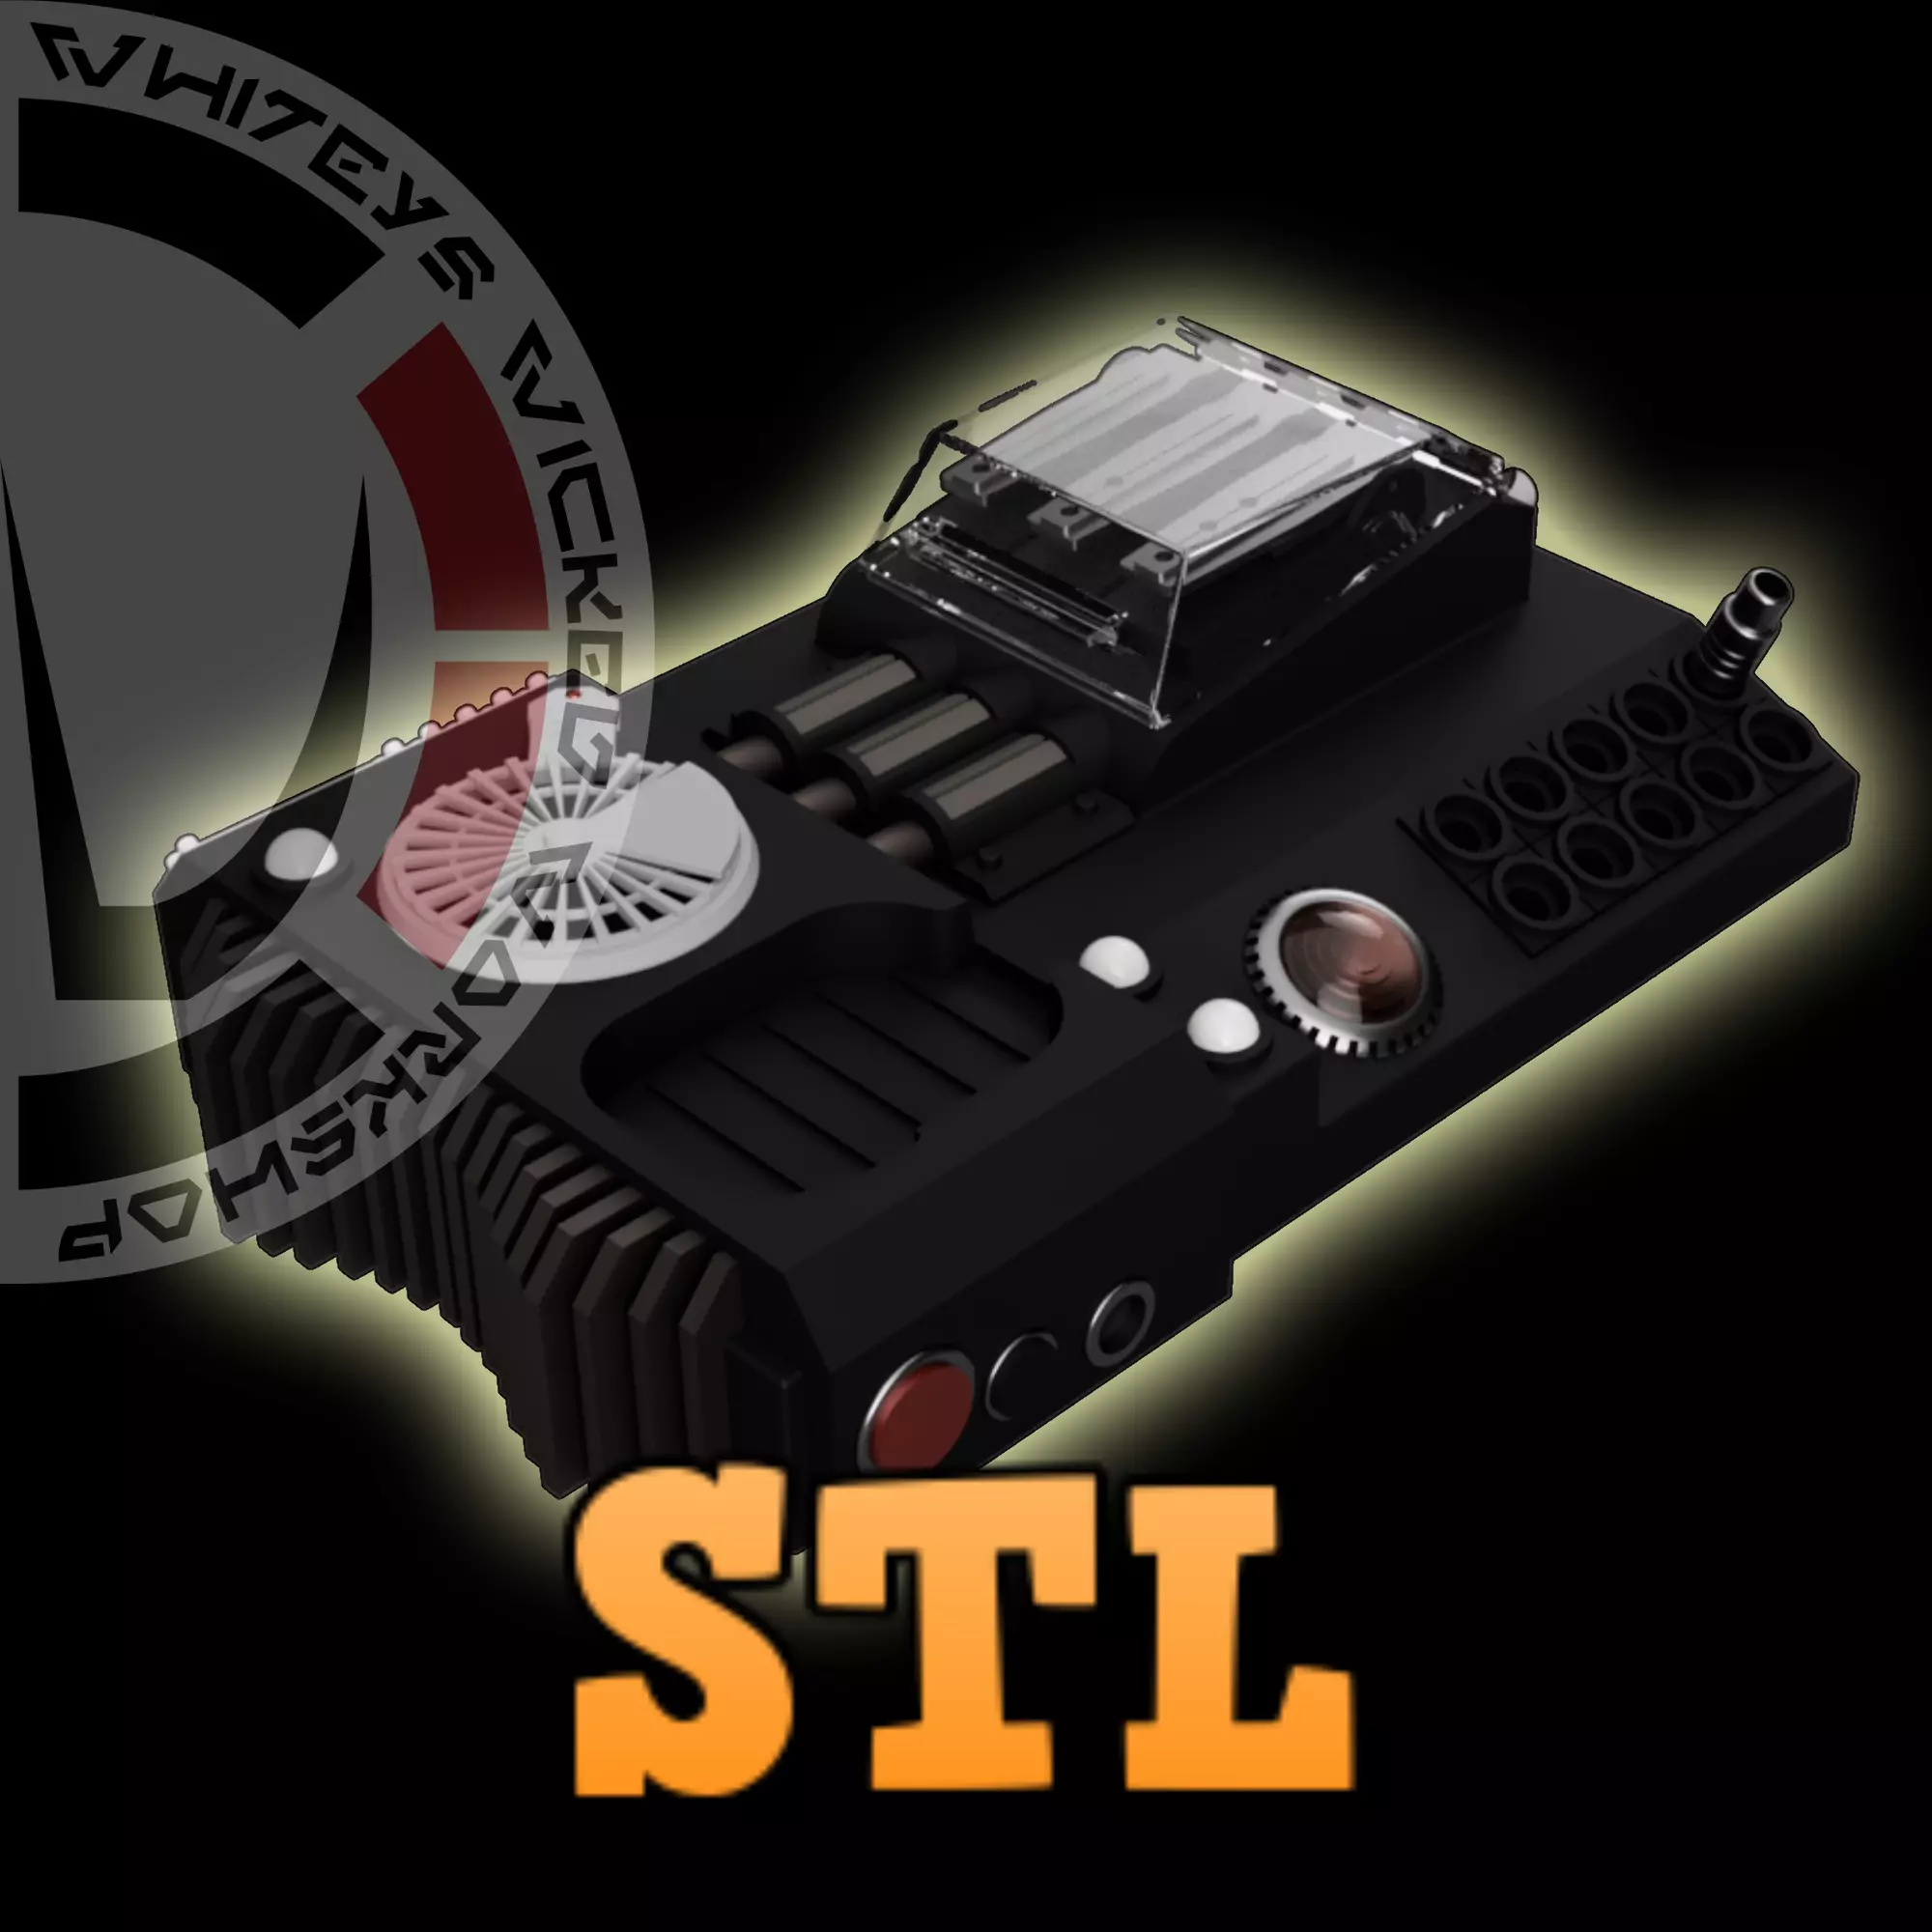
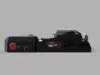
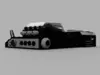
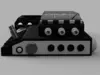
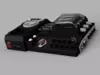
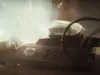
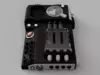
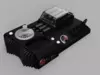
Here is my rendition of Kleya's Safehouse Fractal Radio as seen on Andor Season 2. This is a radio transmitter that was hidden in the wall inside the safehouse used by the rebel forces in the Coruscant area.
All Paid Levels of Patreon Members get 20% off all Etsy items and files ($1/month).or Join Patreon 3d Member tier ($10)Want to print and sell my files? You can with the 3D Merchant Tier ($20)Patreon = WhiteysWickedWorkshop
This listing includes digital files only; no physical items will be shipped.Ensure you have access to a 3D printer or 3D printing service.Due to the digital nature of the product, refunds or exchanges are not available.
Dimensions (see pics): Fits on a 265mm bedTrue size I believe to be upscaled to 166.86%
Assembly:
- Print out all parts.
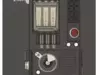
- Do a Dry Run / Test Fit before doing anything.Left Side
- Add Circle, then CircleCover, then use the CircleCoverPin to hold them in place to the Leftbody
- Add the Fins, be careful before gluing
- Add LedPlate to the top side
- Add LargeCable Connector below that
- Add Heatsink right
- Insert the Copper Connectors into the holes on the right side of LeftBody
- Add the CopperSleeves
- Add LargeButton to Bottom Left
- Add Smallbutton to the Bottom middle left
- Add the Smallpowerconnector to the BottomRight. In Andor there is a power cable running into this area.Right Side
- Add StarGreeblie to top right of RightBody
- Add CopperFemaleConnector to area where the CopperConnectors will meet
- Add QTY 3 ButtonTapBase to raised Area
- Add real springs or add ButtonTapSprings to hold the taps into place
- Add ButtonTap-One and insert the ButtonTapPin to hold it in place
- Do this for the next two ButtonTaps, take notice of divets on top
- Add the Hinges
- Add the Cap over top of the hinges and insert the Caphingepin to hold Cap in place
- Add the TogglePanel to the right side
- Add the ToggleSwitches in your desired position into the togglepanel
- Add the Coaxfemale pieces into the 3 holes on Cap side
- Add the Powerknob into the slot over top of TogglePanel
- Add the ToggleLed into the slot over top of TogglePanel
- Add the Lights to the BottomLeft hand side of RightBody
- Push the Smaller-PilotLens nto the PilotBodyTeeth and add to bottom lower area
- Add 10 Cable Connectors into the slots provided in lower area
- the CableconnectorMales are designed to have a cable attached, on other side of cable would be the CompressionConnectors. In Andor 3 cables are used.
PROTIP's:
- Paint and let dry before handling.
- Do a Dry Run / Test Fit before doing anything.
- Do not over tighten the screws
Enjoy!
Please let me know of any issues.
Whitey!