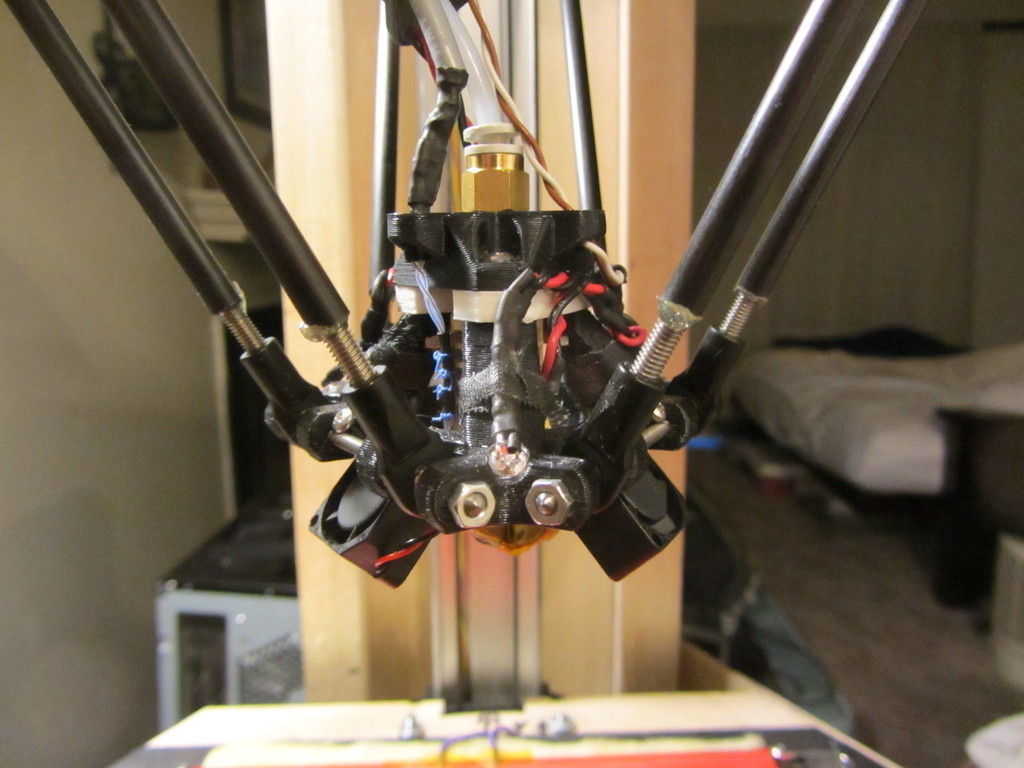
Drews Rostock Skeleton Head Free 3D print model
This is the latest mod I've made to my Rostock-derived 3D printer. This is my attempt to make a hot end carriage that is as structurally minimalistic as possible, while still holding all the components associated with the hot end on my printer. That includes three mini 20mm fans, LEDs, holes to guide the wires, and the mini J-head hot end itself.
Note - the delta platform geometry on my printer is not the same as that on a normal Rostock printer. I moved the rod end holes on the hot end carriage a quarter inch closer to the hot end to reduce the size and weight of the carriage. You can't print this part and use it on a standard Rostock without changing the geometry of the rest of the printer appropriately.
InstructionsYou'll need one of each part.
The 'Clip' part is pressed into the groove on the hot end.
Screw a SMC KQ2H04-01AS push-fit connector for the Bowden tube into the 'Upper' part. This part is printed upside-down relative to how it is installed on your printer. The larger hole on the Upper part then gets pressed over the top of the J-head. The three smaller, inner holes on the Upper part should line up with the three holes on the Clip.
Put three 3mm hex nuts in the pockets on the underside of the angled posts on the 'Lower' part, then use three 3mm screws through the Upper and Clip parts into the Lower part to attach the whole thing together.
Three 80mm long M3 threaded rods go through the holes on the outside of the Lower part, and through the Traxxis rod ends on the connecting rods. Use washers between the plastic and the rod ends to keep the rod ends from moving on the threaded rods.
After inserting the 3mm threaded rods, attach three 20mm fans to the underside of the carriage, aiming at the bottom of the hot end. This direct airflow helps bridging performance considerably. I no longer have fans blowing directly on the hot end itself, but I do have open sides so the hot end cooling fins are exposed, and a large fan mounted on the printer frame that blows air downward across the workspace to keep the head cool.
There are also three pockets for LEDs which are helpful for troubleshooting, ensuring that you'll be able to see the plastic coming out of the head and cooling (or not).
The three larger, outer holes on the Upper part are for running the wires to the hot end heater, thermister, and the power lines to the fans and LEDs. It is still a good idea to also secure the delicate thermister wires directly to the hot end, and anchor the fan and LED wires to the Lower frame.
As the geometry of this piece is specific to my version of the printer, I don't expect or recommend that anyone print these parts and put them right on your own Rostock. As with my other printer mods these are provided for reference for designing your own mods.


