1/13
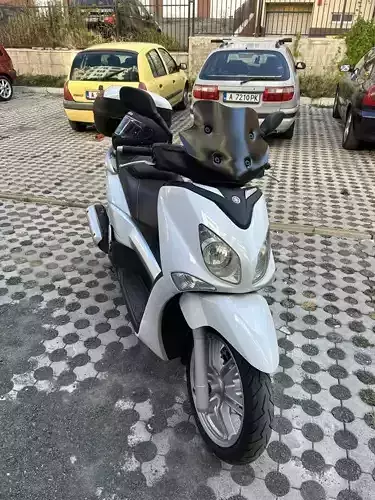
This Yamaha X-City project was something truly different and incredibly exciting!The original windshield is quite large and doesn’t really give off a sporty, dynamic vibe – but we used it as a reference point. I scanned the OEM part and carefully recreated the central base section in CAD, especially the bolt holes that mount the windshield to the bike.
Then came the creative part – using a photo provided by the client, I redesigned the curves and edge lines to create an entirely new shape. The result was a masterpiece – inspired by the original, but with a totally unique design and style. The client was thrilled!
Once the design was finalized, I 3D printed the part using a durable material suitable for outdoor use and real road conditions.Many would ask: “Is it transparent like the OEM windshield?” No, and it doesn’t have to be – this version is shorter and doesn’t obstruct the rider’s view. Instead, it gives the scooter a completely fresh, modern, and aggressive appearance! This is a one-of-a-kind custom part that truly transforms the whole look of the bike.
Check out the photos from the full process – from scanning and CAD design to the final printed part installed on the bike.
Want to give your motorcycle a custom upgrade designed just for you? Marty’s Workshop is the right place! Reach out through our website contact form or via social media – let’s bring your idea to life!
#yamaha #xcity #3dscan #3dprinting #customwindshield #motorcyclemods #motorcycledesign #functionalprototype #cadmodeling #fusion360 #reverseengineering #martysworkshop #uniquedesign #motorcyclelife #3dprintmagic
3D printing settingsThe model is already oriented for print-Recommended material: PETG-Wall count: 6–8 walls-Supports: EnabledYou can sand and spray paint after print for finish look like original one!
REVIEWS & COMMENTS
accuracy, and usability.


