1/6
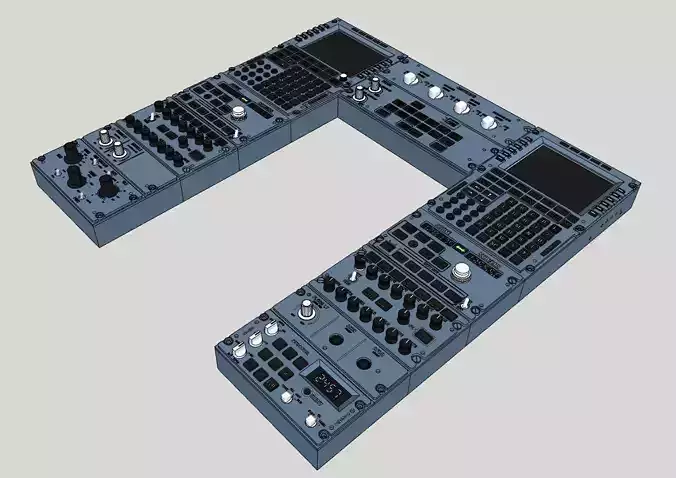
A320 FULL PEDESTAL
NO PCB NEEDED!
RMP SUPPORT KAV Simulations LCD
MCDU has the option for B737 interface
All panels do not need any PCB as it has the unique Button Base panel for easily insert and attach buttons, switches, rotary, potentiometers and encoders BUT the MCDU seamlessly integrates with the A320 MCDU PCB that I offer on eBay (link below), making it a truly comprehensive and customizable solution for your flight simulator setup.
ECAM panel also compatible with MANTOGA's Korry buttons.A link to the button is in the designated folder.
It is also possible to print only the covers and bolt it all to a pedestal board.Includes nuts for screws compatible with AIRBUS models.
All panels includes all the necessary mechanisms.
Each panel can be printed and operated individually.
It is not necessary to print all at once.
Panels can be assembled and connected together anytime.
Each panel includes a step by step assembly manual and shopping parts list.
Dimensions and Part list inside each panel ZIP file**
Purchase recommendations:
A320 MCDU PCB: https://www.ebay.com/itm/256697750486
Simplify Your 3D Printed Cockpit. Simplifies the wiring process and eliminates the need for separate electronics purchases.
128 button: https://www.ebay.com/itm/254777785202
128 buttons input joystick including 3 axis to easily connect all buttons and potentiometers to USB without the need for any special programing. Just wire, connect, plug and play.
Dimensions and Part list inside each panel ZIP file
BONUS
Anyone who purchases this pedestal will get the WX-Radar, the AIDS/DFDR and ATC/TCAS FREE
3D printing settings:
Designed for minimum 150x150 printing bed.
There are 3 printing options:
1) Use a double head printer (dual extruder) and print the inscription in a different color.
2) Use a printer with one head and do not print the inscription so that it is sunken into the panel.
3) Where applicable, use a printer with one head but print the transparent PLA (TPLA) version so the inscription will stand out above the panel.
REVIEWS & COMMENTS
accuracy, and usability.


