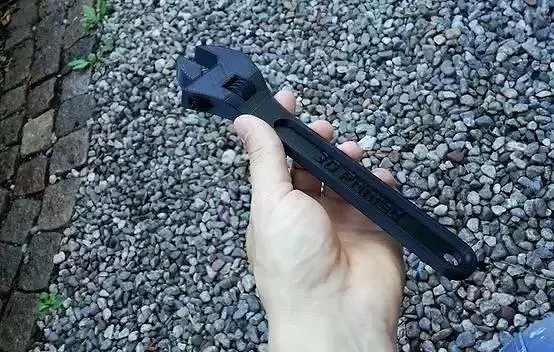
A working 3D printed friction shifter! See video at http://youtu.be/fLMA-8aSsDM While friction shifters don't "click" into gear like index shifters - they have advantages. A friction shifter is much more tolerant of minor problems like slightly bent derailers or worn cables / housings. Heavily tested with 7-speed setup - but should work with any number of speeds (front or rear derailer). I just biked from Seattle to Portland using this shifter (204 miles) without any problems. With 300+ miles on same shifter - I'm reasonably confident it's pretty solid and should last a while.
Instructions
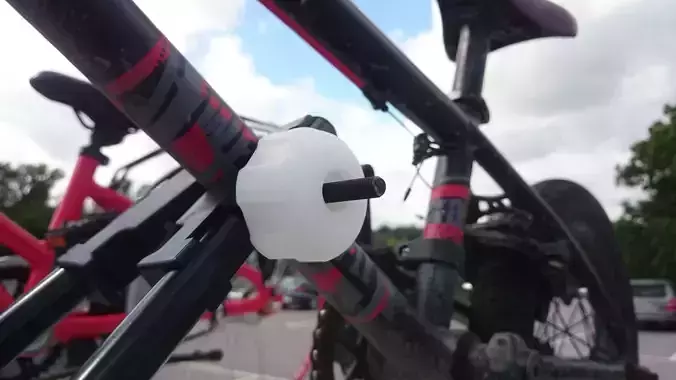
The shifter has three parts bottom_assembly, lever and washer. I've included Solidworks designs files and IGES format - if you're printing just get the 3 STL files. Printed on Makerbot Replicator 2: Black PLA 2 Shells 100% Infill About 1.5 hour print time The above settings are fairly conservative / fairly bomb-proof. You can probably get an adequately tough print using less infill (but you may want to add another shell or two). If you want a fully solid print with Makerware 2.2 or later - create a custom profile and set the infill style as linear. I found this was creating some cosmetic print issues - so I've gone back to the default hexagonal fill (which seems strong enough). Non-printed parts: 2x #10 Nylon Lock Nuts 2x #10 x 1" Machine Screws 3x #8 Washers (yup - they fit) Splicing tape (or thin piece of rubber) for mounting (standard electrical tape does not work) Assembly / install should be pretty intuitive. The three washers are all stacked on top of the lever - and primarily act as a spacer so the 1" machine screws fit. The screw works as a friction adjustment and allows for a large amount of wear before anything needs to be replaced. Use the splicing tape (decent hardware stores will have this) to assure a snug mount that doesn't shift around. You might be able to substitute rubber bands / something else for this. --Do not over-tighten the handlebar mounting bolt - that's one way to crack the base.-- Make sure the screw fits in the lever without binding (it's OK if it binds a bit in the base piece). If it binds - drill it out until it doesn't (otherwise the shifter may loosen/tighten itself). Adding a small amount of bike lube between the washers may also help prevent things from loosening (do not lube anyplace else). Want to adjust your shifter using your metric bike Allen wrenches? Just use a standard #10-32 cap screw. It uses a 5/32" hex wrench to drive - which is virtually identical to a 4mm hex wrench (this is how I currently have things setup). You can also use a #10-32 thumb screw for tool-free adjusting. Expect a few friction adjustments in the first mile or two - then again around mile 50 - and less frequently after that. I just biked from Seattle to Portland (204 miles) with no adjustments! Over 400+ miles on the same print so far! Minor 1.1 Update: The screw holes are a bit wider and shouldn't need to be drilled out to avoid binding now. Removed the top "stop" (the derailer's stop takes care of this) and repositioned the bottom stop for easier reach.