The secret Nozzle Container for your coffee break 3D print model
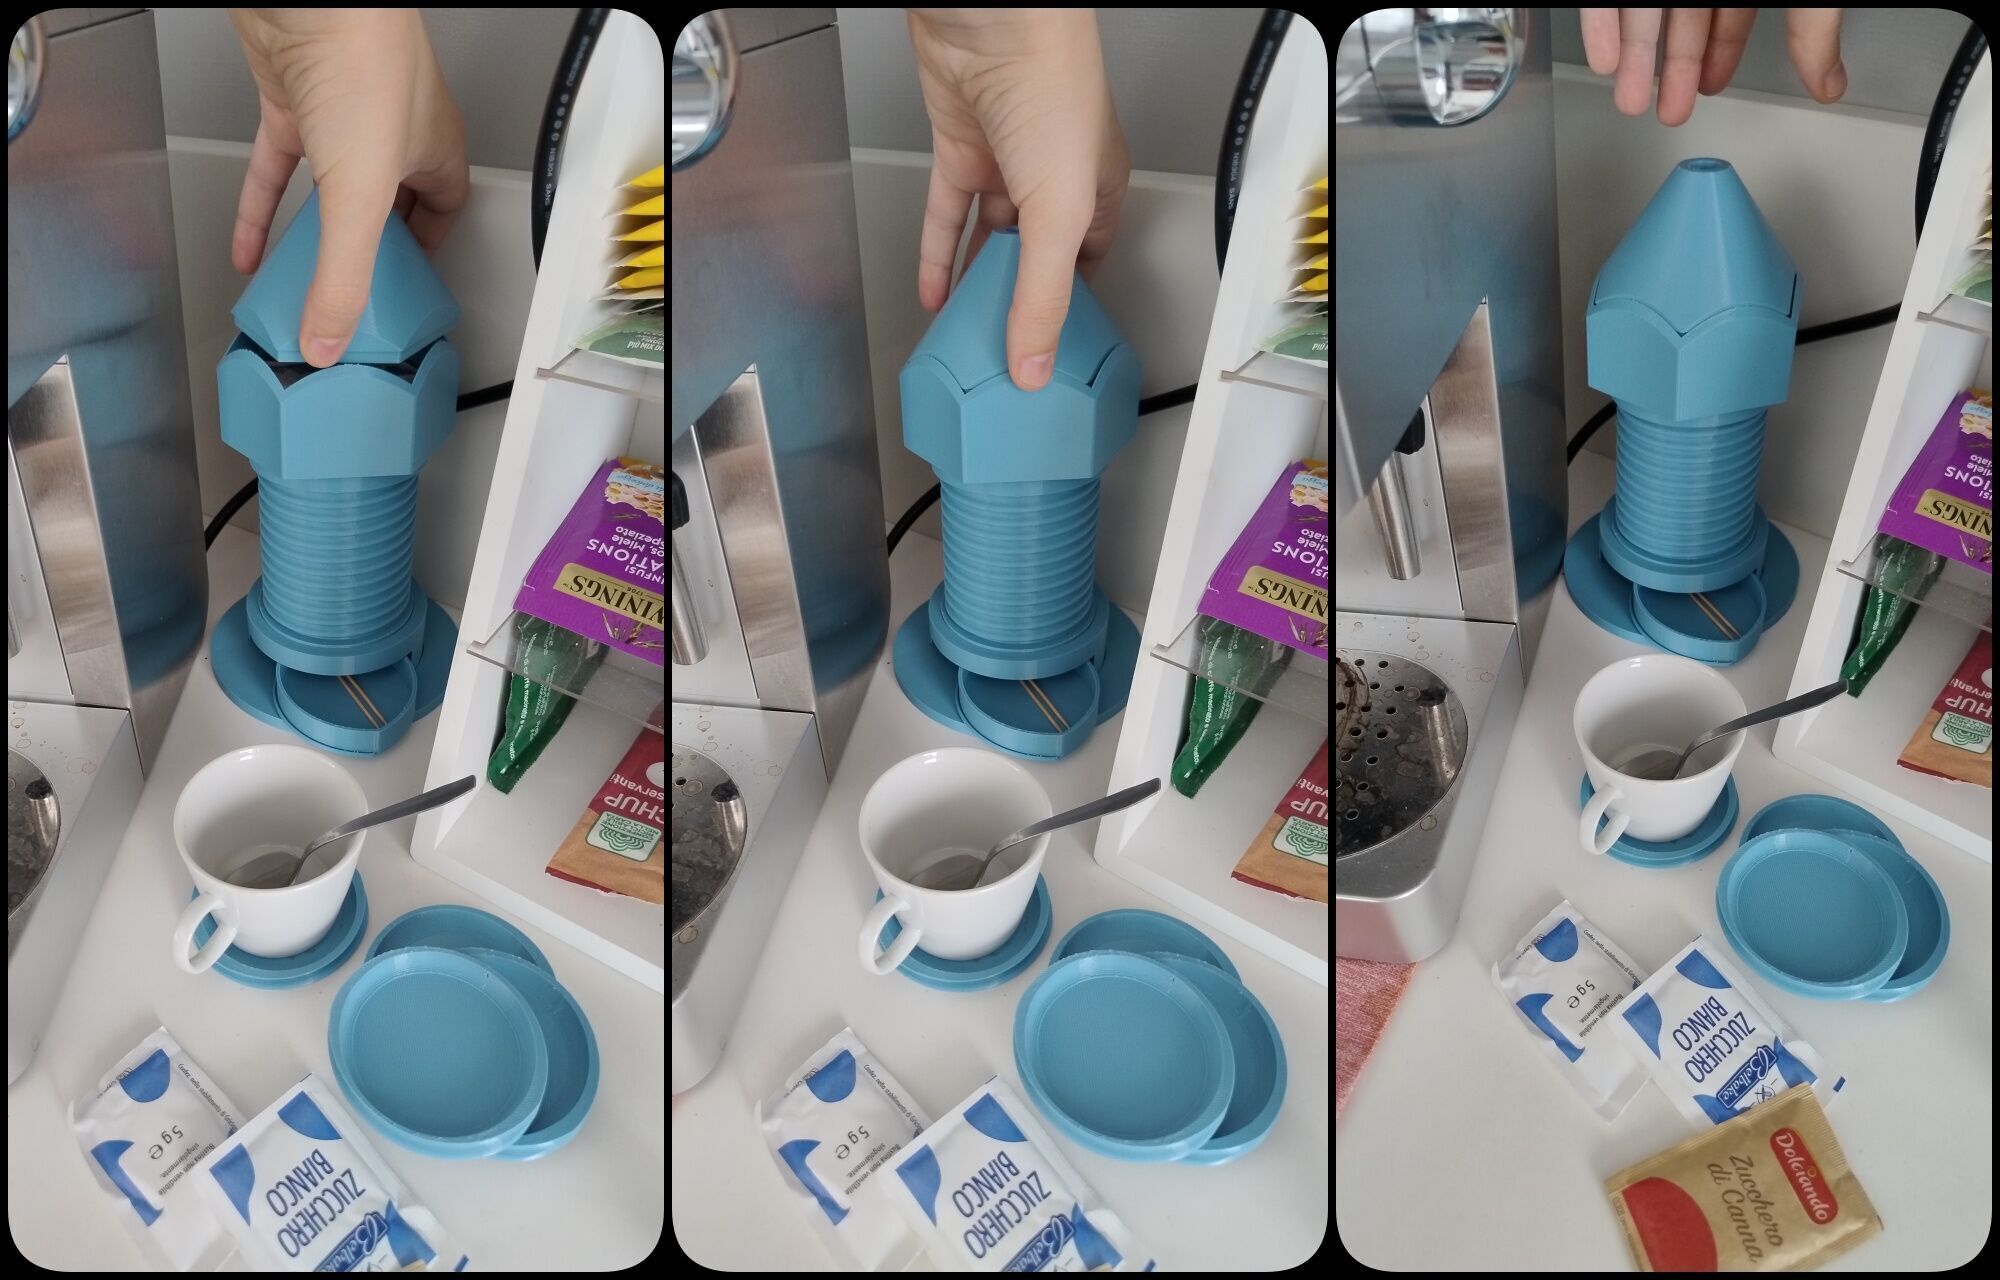
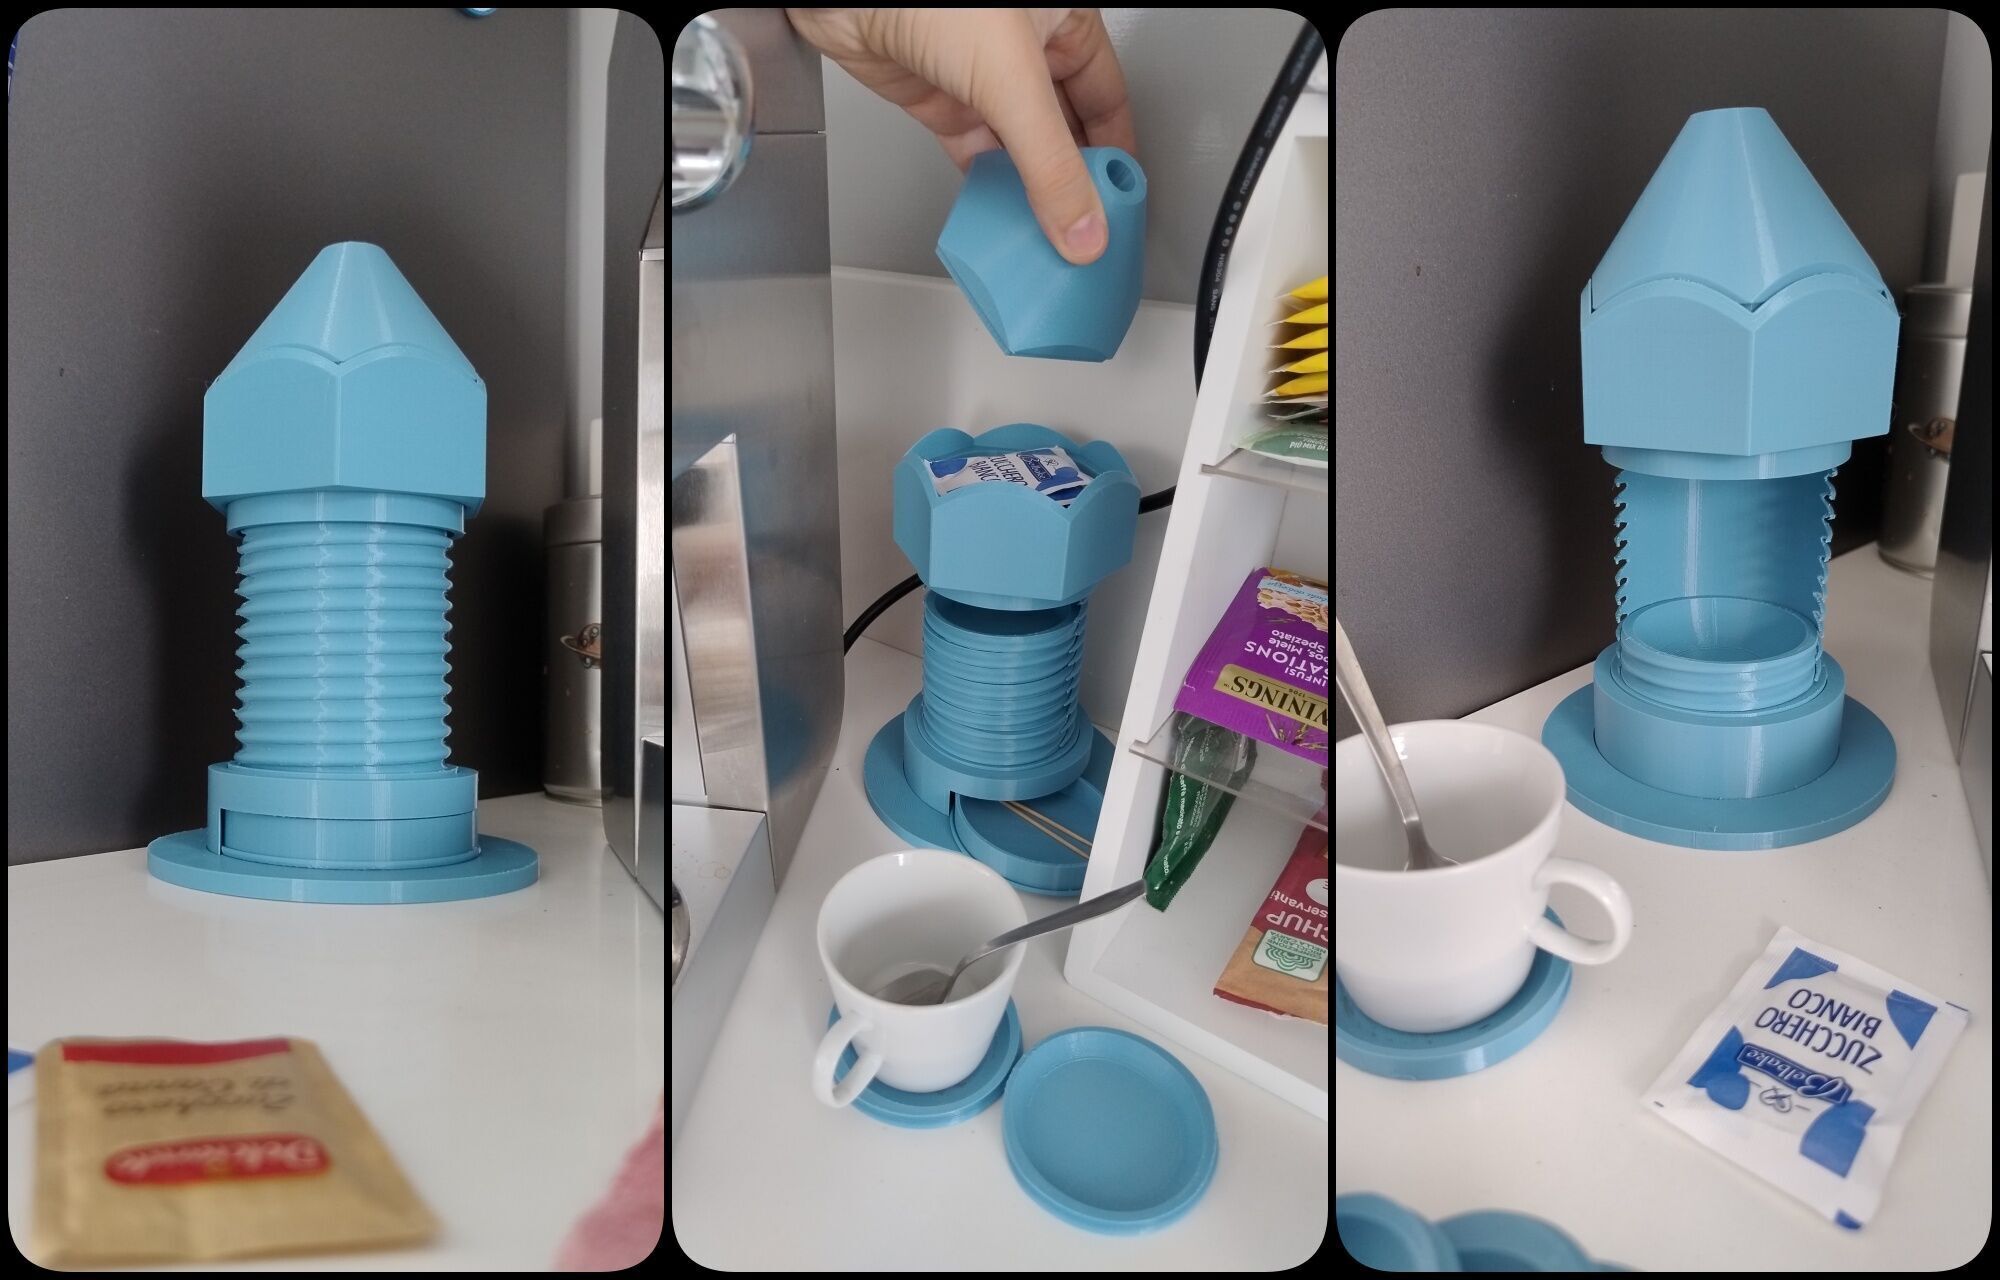
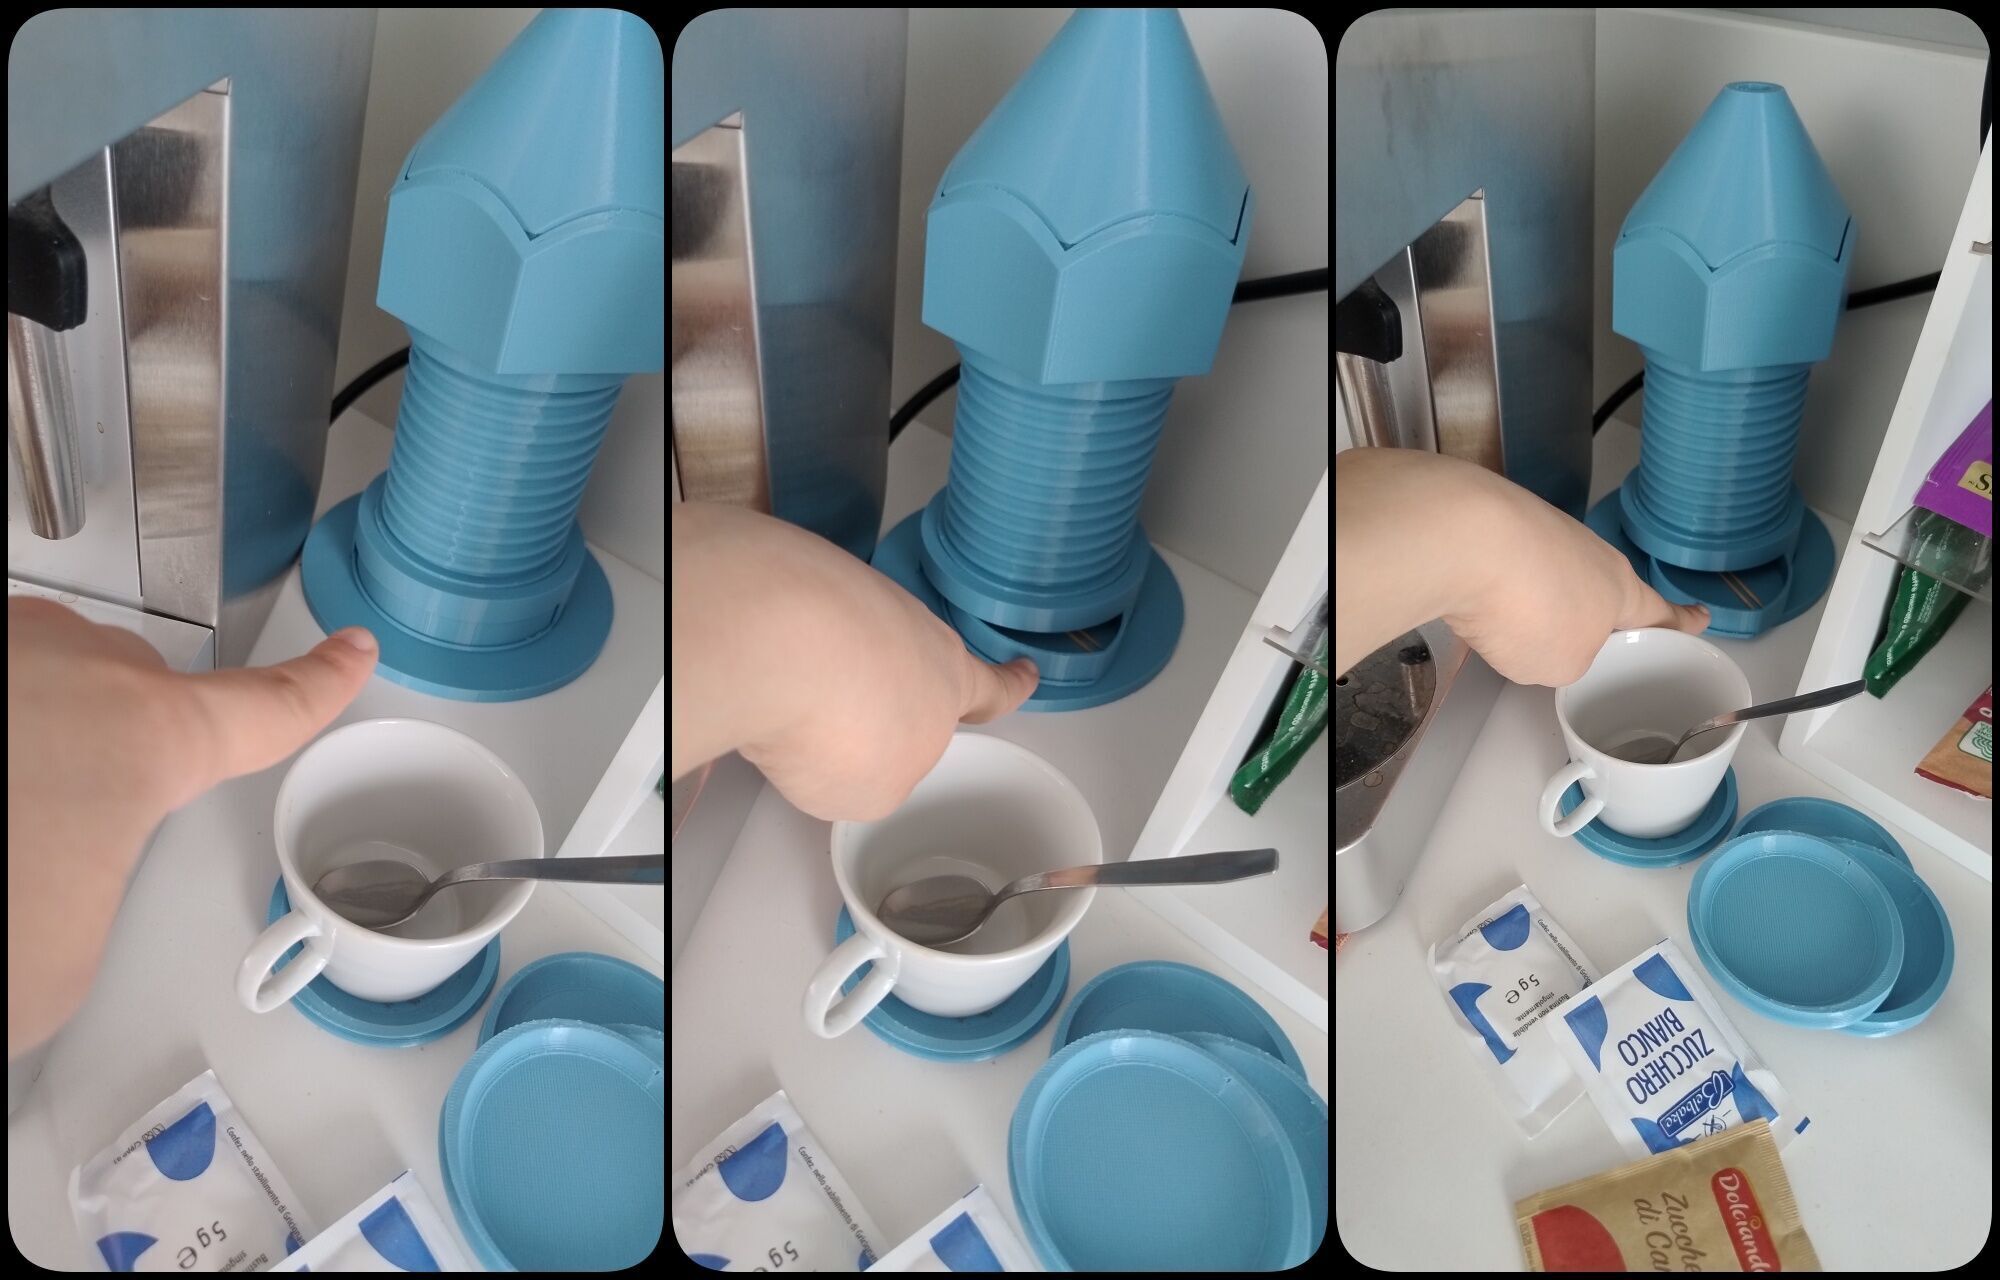
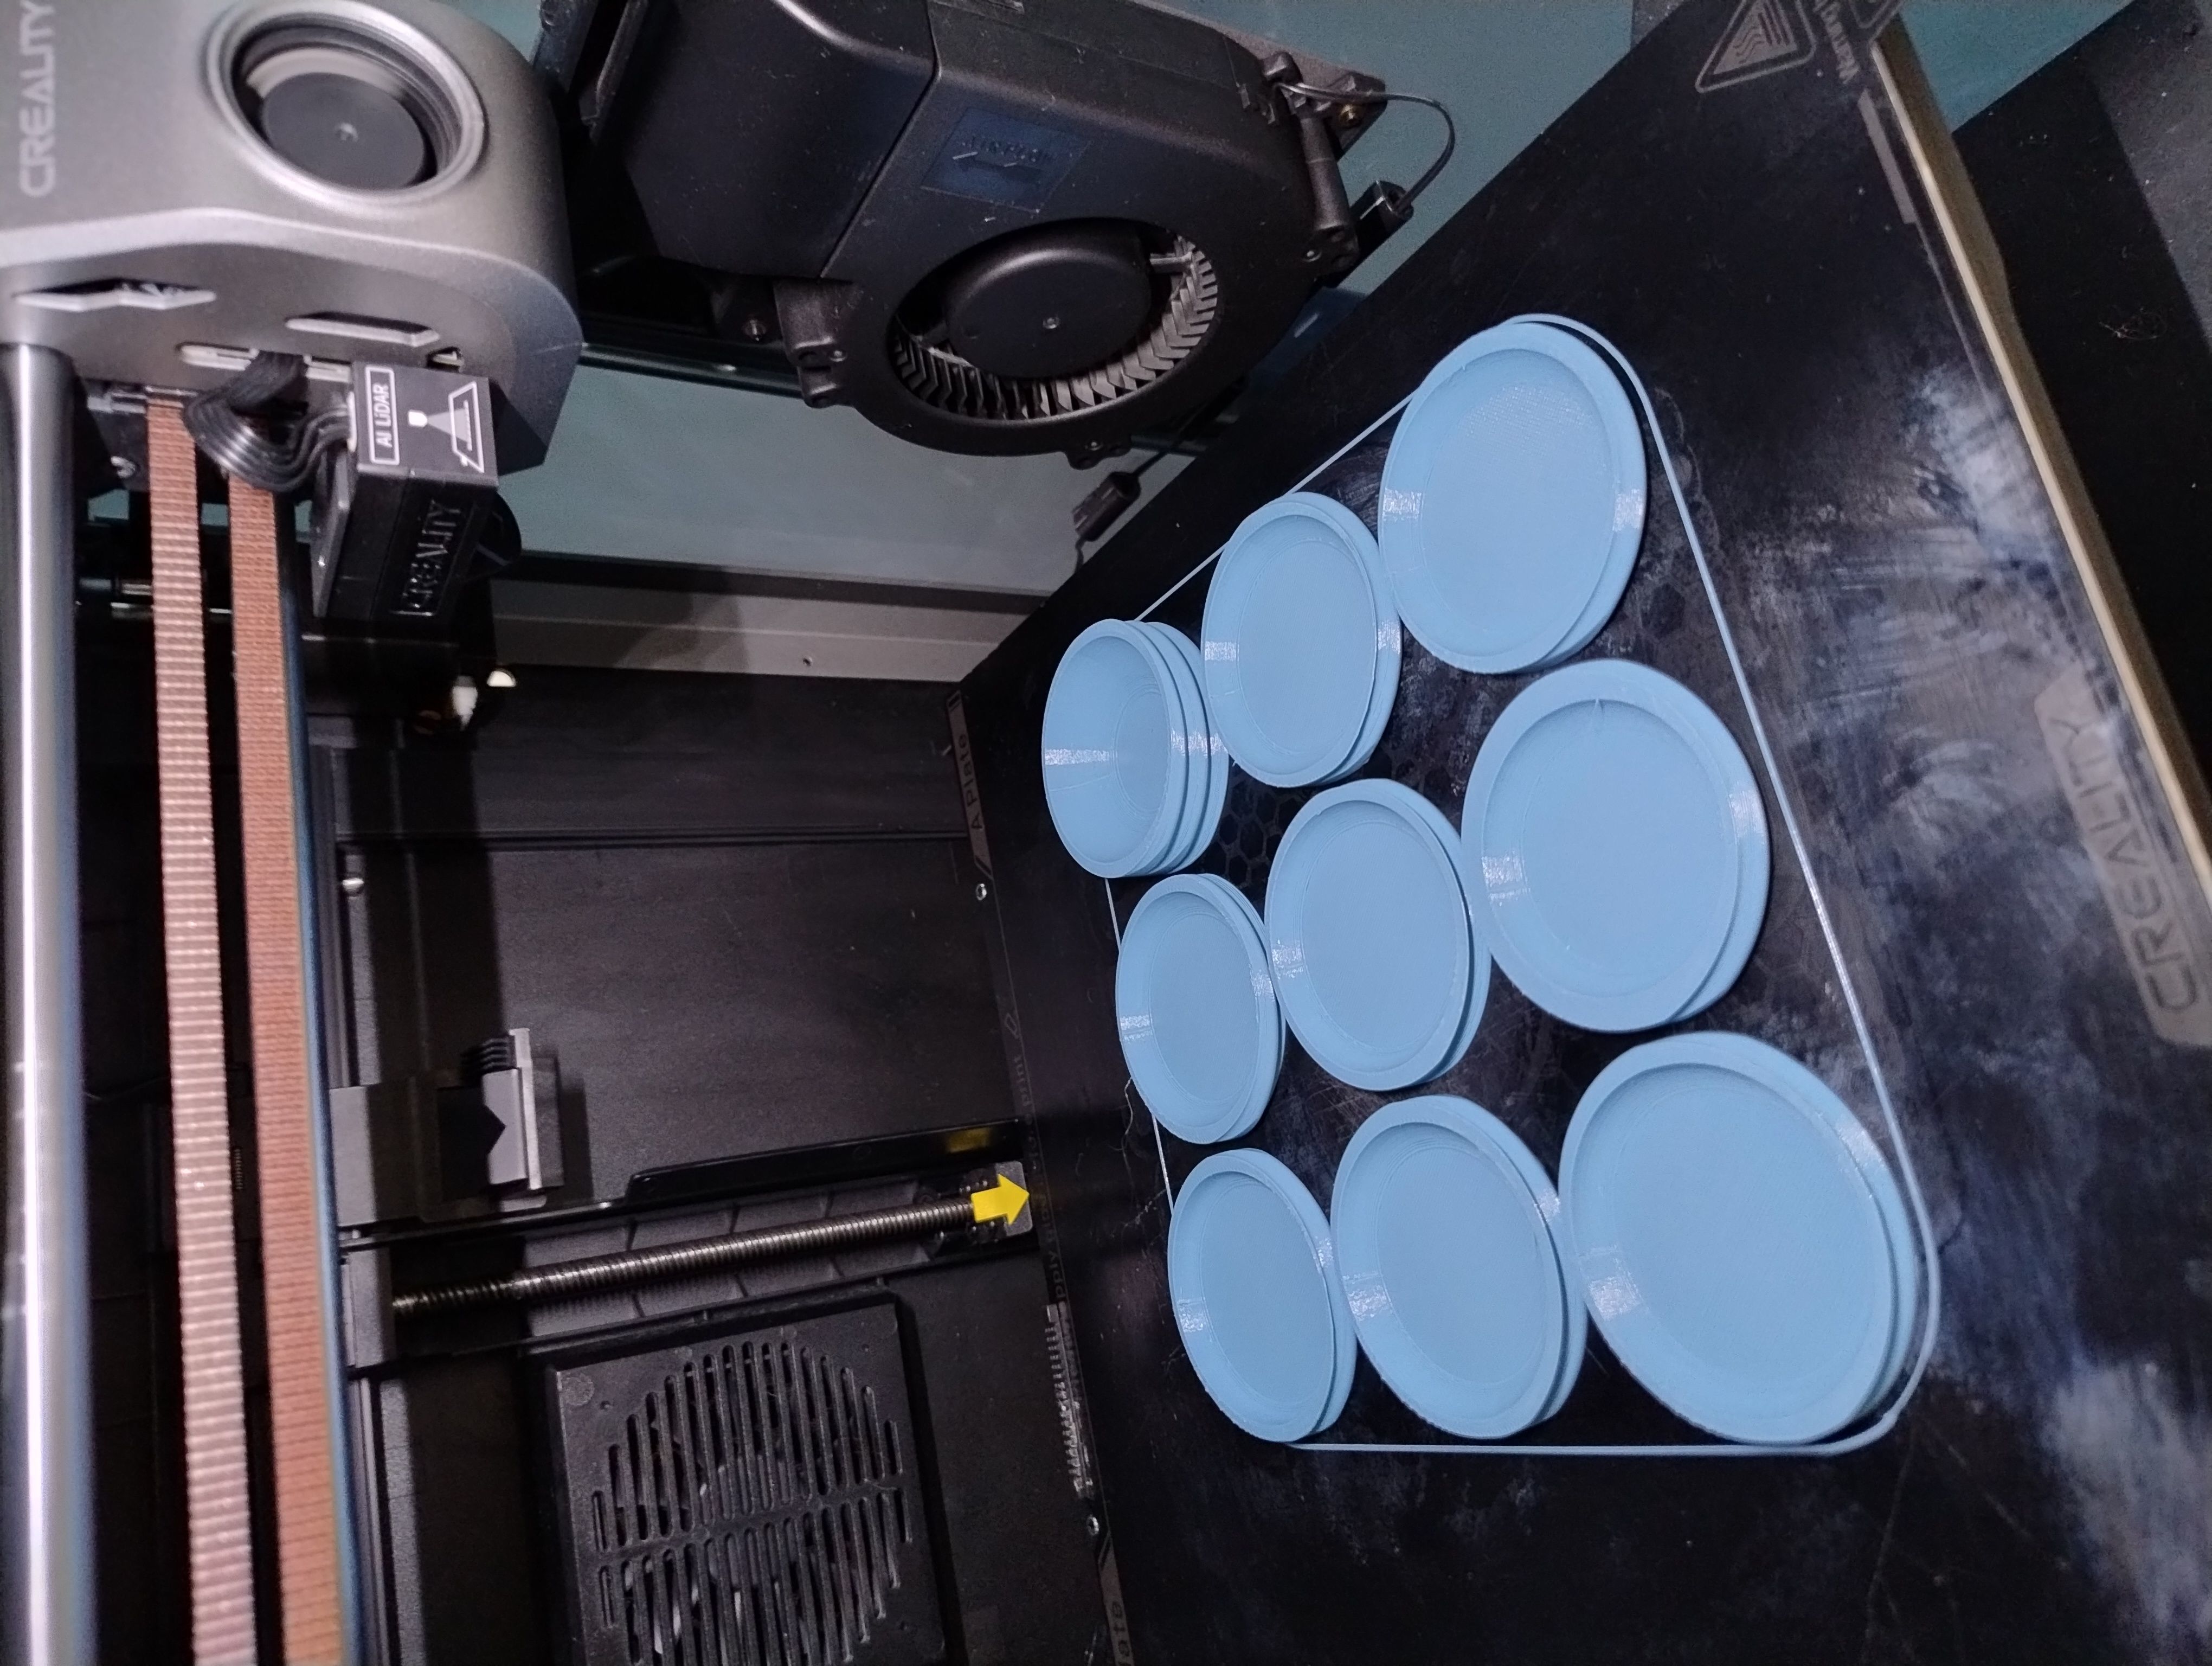
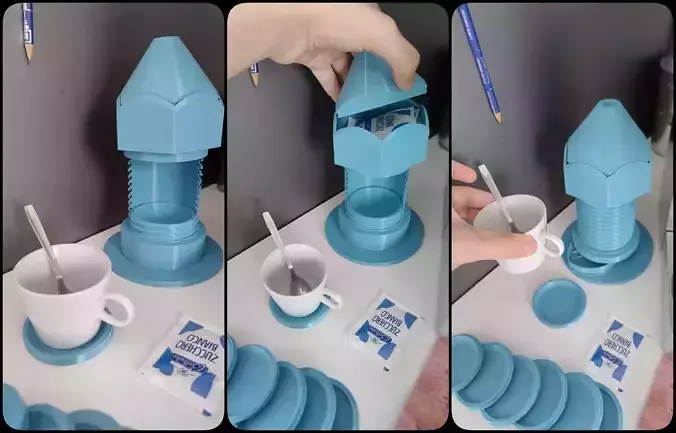
CONCEPT:original idea designed by an Italian designer (me).The nozzle cap is a secret container in which to insert sugar packets or other things. No dust will enter from above because the hole in the nozzle is plugged.There is also a secret drawer under the nozzle, push it with your finger to open it! I put some toothpicks in there that I use to remove coffee pods when they are too hot.The nozzle contains secret plates that you can remove from the side (by sliding them) or from above. The saucers fit into the body of the nozzle, they will not come out on their own. The interlocking of the saucers has a magnetic sensation to the touch: by pushing them slightly they will continue to close on their own.You can use the saucers to place dirty objects without staining the kitchen table. In this example I will use them as coasters.The last plate, the lowest one, is like a small drawer because it is deeper than the others (double).You can rotate the nozzle to show the screw always perfect and full or to show the half that empties as you remove the plates.HOW TO PRINT IT:Download the complete nozzle model, divide it into several parts, place them all on the print bed without overlapping them, slice, print, assemble all the interlocking pieces and you are ready to use your new coffee corner nozzle!3 VERSIONS:Version 1 is a version with thinner walls, less reinforced and the joints are more precise: once it is fitted it will be difficult to change broken parts or replace them with parts simply coloured differently!Version 2 is more solid: the walls of the base are thicker, all the rest of the model is still compatible with version 1! If you printed version 1 and want to update it to version 2 download the files that start with v2 i.e. those of the base and the plates (the plates of version 2 have the numbers underneath to be able to install them more quickly).Version 3 has an easier to print body (no more difficult to print tips, it will have a soft wavy profile easy to print), the plates are a little smaller and have the screw texture on each side, not just the exposed one! This nozzle cap does not require supports to be printed because it is chamfered at the bottom. The nozzle cap is compatible with previous versions. The ring v3 allows for quick removal of the cap. So as to remove the saucers from above as well, not just by pushing them sideways out of the nozzle body.
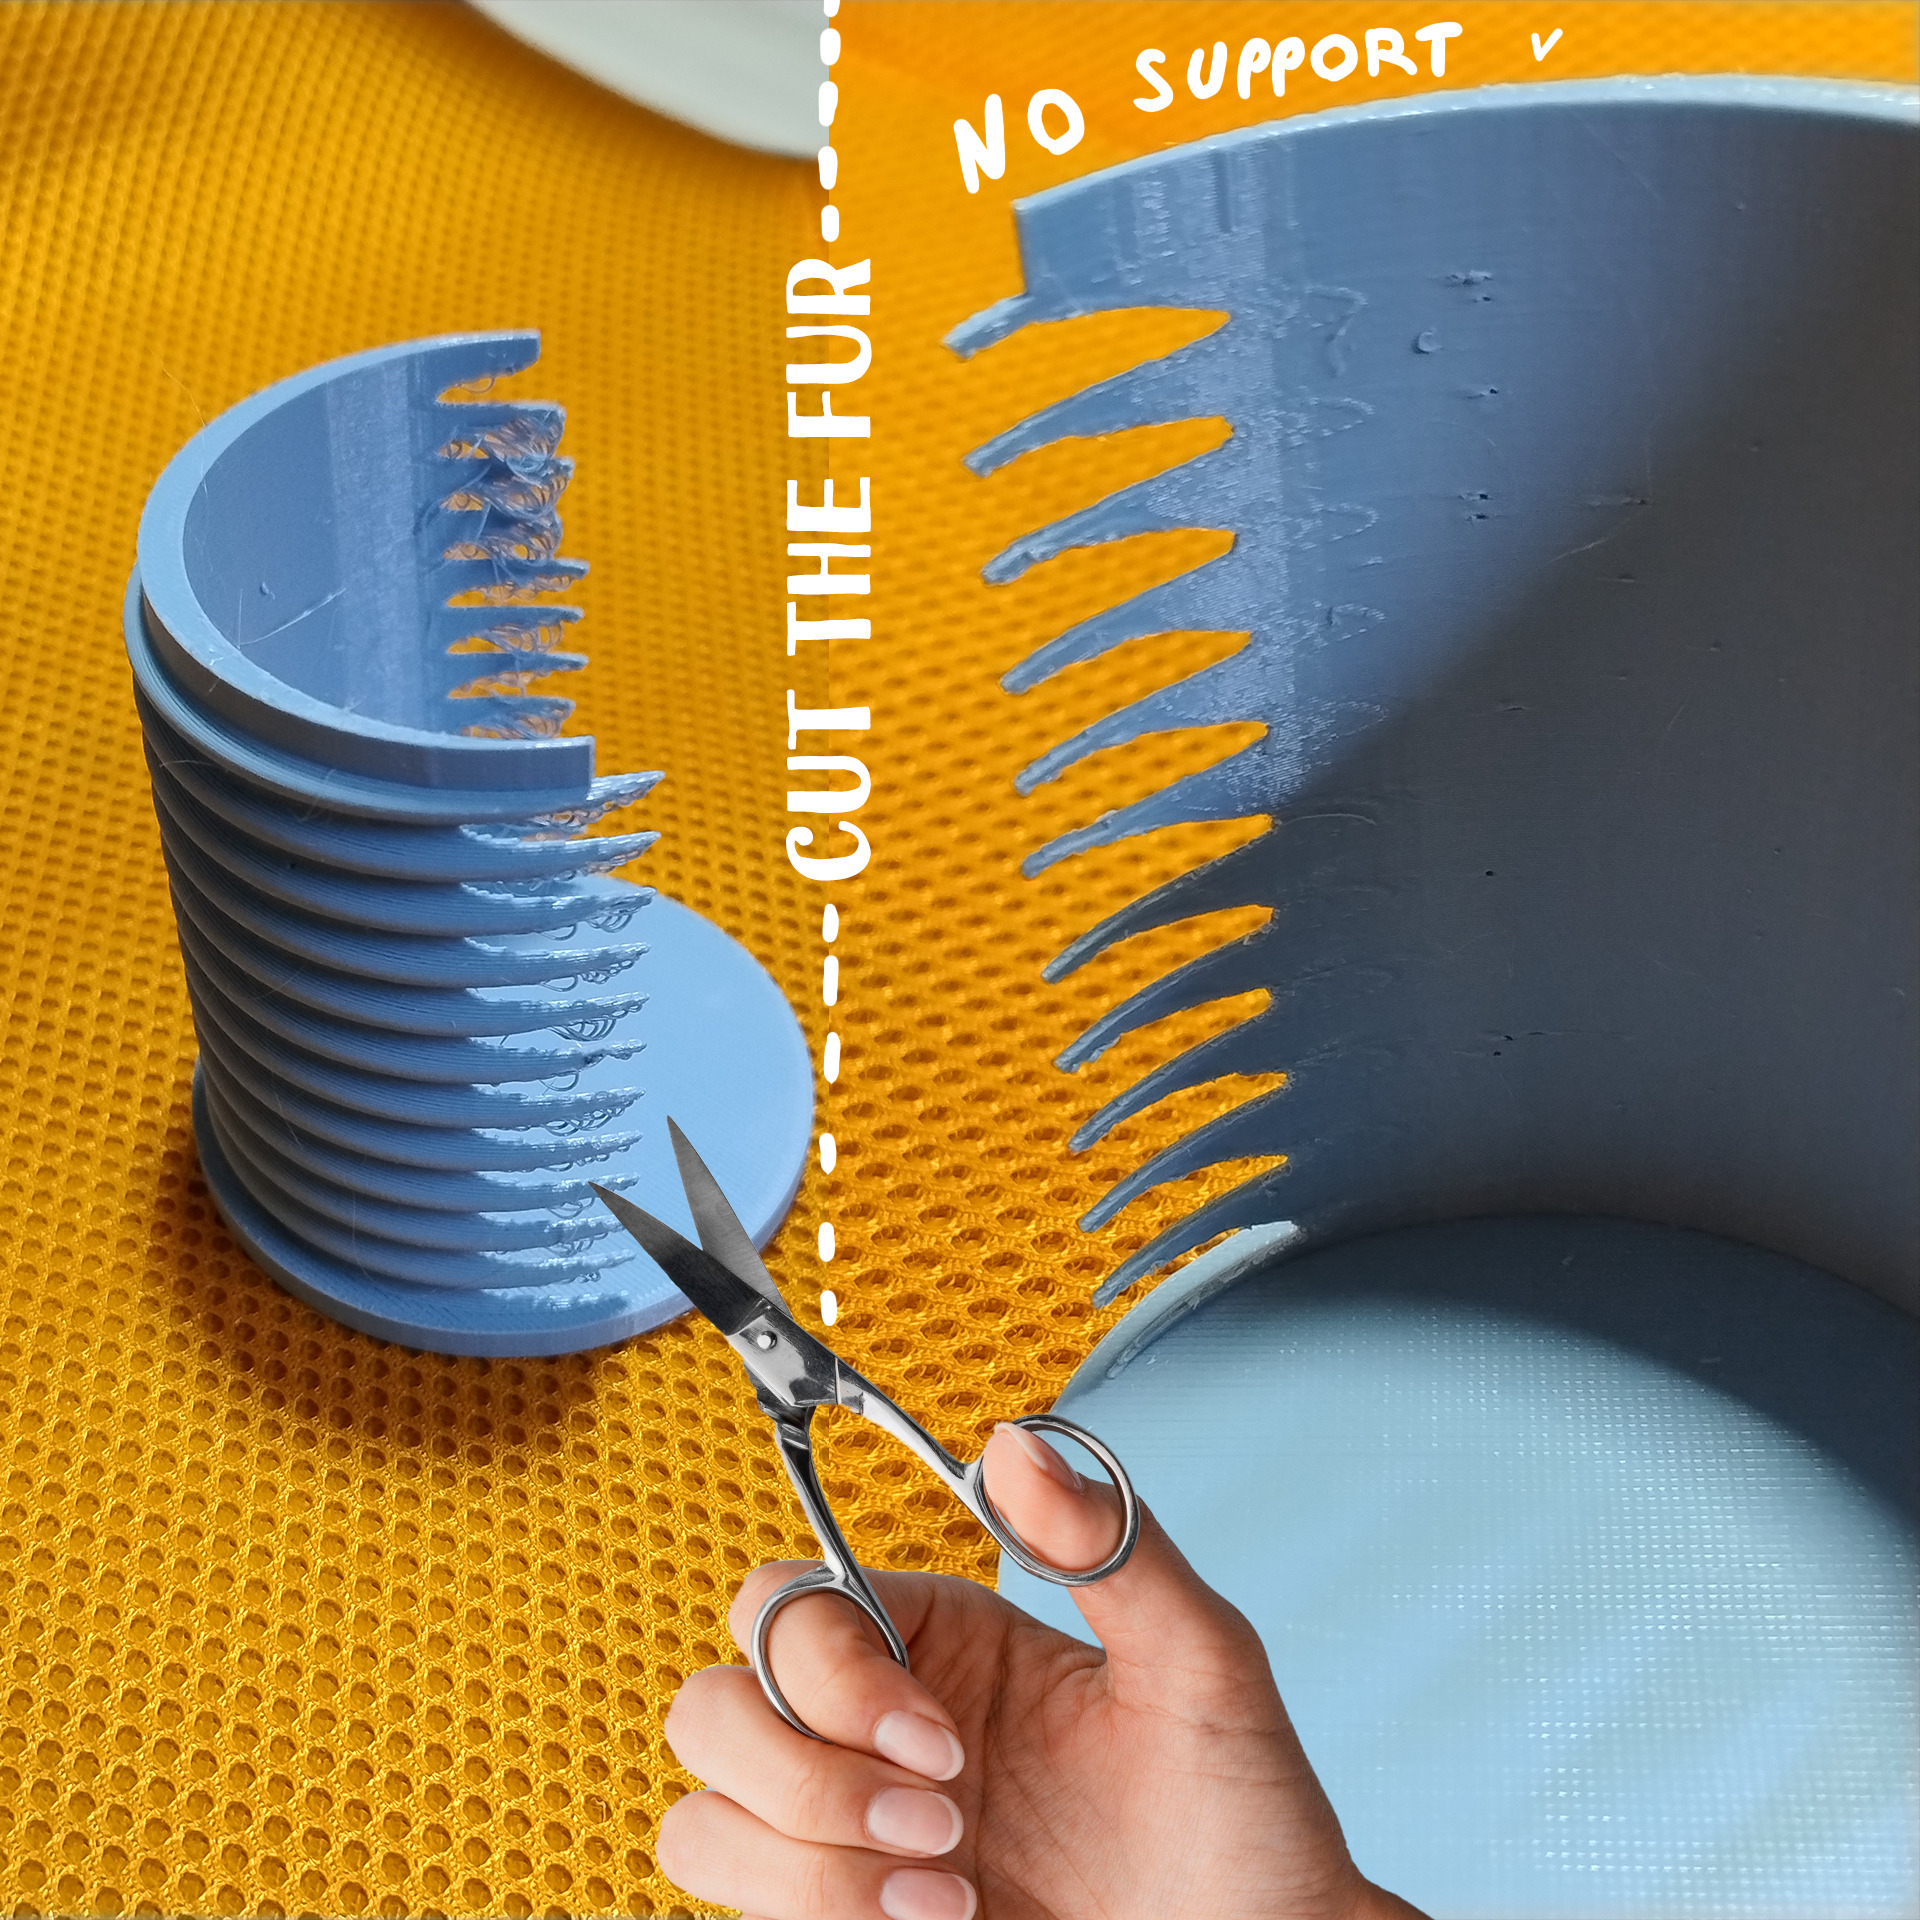
HOW TO USE THE FULL NOZZLE FILE:Import the file FULL NOZZLE to be separated into objects.stl in your slicing software, right-click on the model and select Split to Objects (that works like Separate by loose parts of Blender!).If you want to update it, download the individual files of the different versions. Only the updates are downloadable individually (this way you can evaluate the differences between the versions yourself because the individual files are actually the updated parts).Assembly: Assembly is very intuitive, no instructions required. If you have any doubts, look at the file with the complete nozzle and use it as a preview (it is fully assembled)!Do I need glue?I didn't use glue and I kept the joints slightly loose so that I could easily replace the pieces to create new personalized variations and to change the color of some parts!I prefer freedom to solidity. If you want to make it solid and not disassemble it anymore, use a bit of glue or print the joint a little tighter (less than a millimeter will be enough, or 0.4mm more if you use a 0.4 nozzle and a 0.2 layer).Do you need supports?No, you don't, but you need to know your filament and printer well to get great results.All the parts are designed to be printed without supports so as not to waste plastic and time (there are curved bridges and protrusions. The hidden parts may be a bit irregular because of the long bridges but they won't be visible so it won't be an aesthetic problem!).Version 1 of the body is the most difficult part to print because it has long and thin protrusions: I used very slow movements and after printing I did some post-production (I cut the plastic hairs that covered the protrusions with a small pair of scissors. Once the plastic hairs were removed the main geometry was intact and smooth).You can use supports or slices if you are not sure of your printing parameters! If you are a beginner it is a great opportunity to test yourself and learn more about your printer.MY PRINTING CONFIG:Example printed with scale: 116,95%Print it bigger if you want to use mugs or to put more sugar in the nozzle end!I printed version 1 body, with version 2 strong base and plates and version 3 cap and cap ring. You can print the combination you prefer also with different colors!I prefer to use chemical resistant materials so I can clean it from the coffee (I used a petg filament with a color that matches my coffee corner!).I used Creality Print as slicing software and K1 max:0.2mm layer, 3 walls, 4% infill, no supports, petg (I have a very slow petg filament so I printed first layer at 15-20mm/s, external walls at 30mms, internal parts at 60mms and infill at 120mms).Remember to keep the print bed clean and not touch it with oily hands.
Print & SellCOMMERCIAL USE:You can sell renders and 3D prints for commercial use.You can't distribute the digital 3D model files.:) The price is temporarily low!
UPDATES:Hi! I've added one last improvement! If you don't want to use glue and want to use the cap so you can open it to remove the plates from the top, then print Stable Ring v4. It's compatible with all previous versions; it's a ring that connects the body and the head. If you want the plates to cover the entire body without leaving any gaps, print plate 7 adapted for Ring 4 (it's still the same plate, but with the precise height to fit. You won't need plates 8 and 9 anymore because they'll be replaced by a ring reinforcement). The plates for the perfect fits are: Standard Plate v7 for Ring4.stl (if you are using body v1, that I really like!) or Small Plate7 for RingV4.stl if you are using the body that is easy to print (body v3).Customize it and combine it as you like!

