1/4
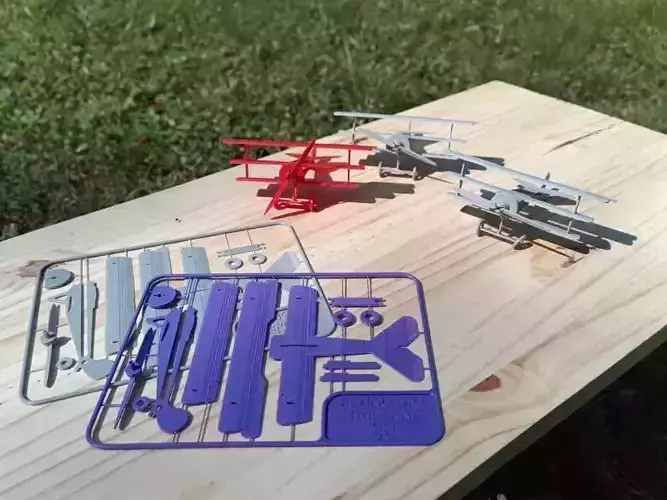
This is a flying kit card model based on the Fokker DR1 Triplanes that flew in the first World War.
The wingspan of the top wing and control surfaces comes in at just 110mm (a hair over 4 inches.) Snap the parts out and clean them up, a little super glue, a piece of .5mm jewelry elastic and a dab or two of lubrication and this little Baron is ready to take flight! Be careful removing this model from the buildplate to preserve the small details and thin areas. Also, the propeller is intentionally long to allow trimming to alter the flight characteristics- an independent file for a spare prop is included in case you trim a little too much.
0.2mm layer heights work best for some of the thinner areas. Drop your print speed! A modern high speed printer will cause some roundness in the corners and lead to more cleanup when assembling. Favor lighter filaments if you plan for this model to fly- ABS/ASA, HIPS, PP all have decent strength and densities near 1g/cm3. For the best performance a foaming/lightweight PLA is an option, but expensive if you don't already have a spool on hand..
This Thing is marked as a work in progress due to issues with the elastic. Currently, the planes are only capable of powered flight for 2-3 seconds, and the elastic I've been using fails after 1-2 flights. I have a tons of different options coming, and will be experimenting to determine the best material for this build, with a goal of at least 10 seconds flight time. In the meantime, this is still a fun model to build!
Steps as indicated by the provided image:First, remove all pieces, clean up with a hobby knife where needed, and dry fit components to see where you may need to trim/file/sand/etc.
Combine the Fuselage and Central Wing with a few dabs of glue.Slide in the Lower WingInsert Spars from above- Note: the thicker section remains on top of the main wing, with the top pin forward. Small drops of glue where spars meet wings.Attach the Top Wing, again with small dots of glue on mating surfaces.Glue the Wheel Strut and Engine Cowl to the Fuselage- Note: point the printbed surface of the Cowl forward to provide a smoother surface for the Propeller to ride on. If you have trouble keeping the Fuselage tabs aligned in the Cowl, an M3 screw can be inserted to provide a perfect spacing.Once the glue has cured, gently press the two Wheels onto the Wheel Strut.Insert the Propeller into the Thrust Bearing, slide both into the hole in the Cowl- Notes: ensure the printbed surface of the Bearing is making contact with the printbed surface of the Cowl, adding a drop of silicone or other stable lubricant to both sides of the bearing is recommended. An M3 washer can be added to reduce the friction between the Cowl and Bearing.Wrap a piece of ~0.5mm elastic around the Propeller, and feed it through the Fuselage, tie it off at the hole in the back of the Fuselage and trim any excess.
REVIEWS & COMMENTS
accuracy, and usability.


