1/12
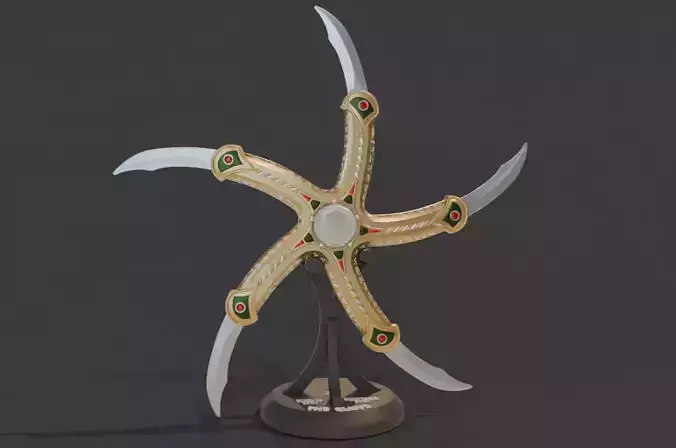
The Krull Glaive is based on the hero weapon depicted in the 1983 cult classic, Krull. In the film, the Glaive is a mystically enchanted five bladed weapon. In reality, a glaive is a pole weapon, but this is based on fiction weapon. In the film, the Glaive is found in lava and later used to storm the fortress of intergalactic demons. The hero uses his thoughts to guide the weapon when thrown, blocking energy blasts, cutting through walls, and destroying just about anything it encounters. After images and video of the hero prop became available, I decided to create a detailed replica, closer to the design in the film, unlike most of what I've seen from other creators. While I have taken a few liberties, I tried to stay close to my reference materials, only making adjustments for 3d print purposes and use. This display only replica is approximately 317mm in diameter once assembled. Without blades, the body is about 203mm across. This is about as close to the original size as I could get without having access to the film use props. In addition to the replica, a simple stand has been provided for display.
This Glaive has been modified to make printing easier. The Glaive has been created in parts, allowing for several print approaches and assembly options. Be sure to unzip archived STLs to access all parts.
Easy Print/Assembly (Print all parts on their flattest ends if possible)
The simplest method for print and assembly means printing the bodyFront, bodyRear, 5 blades, 10 gemRubies, 10 gemJades, 2, Crystals, and 5 bodyPegs.
- Remove any supports and sand down any print artifacts.
- Slot the 5 pegs into the flat back of the bodyFront.
- Apply glue to the central area of the bodyRear. Avoid edge overflows.
- Align and seat he bodyRear onto the pegs to align with bodyFront.
If printing the full front and back is too difficult, print 5 bodyFront_segments, 5 bodyRear_segments, and 10 segment pegs.
- Insert a peg into each segment along the curved concaved bottom.
- Glue and align segments, slotting pegs into segments to ensure body alignment for front and rear.
- Once the front and rear body are assembled, align and seat he bodyRear onto the pegs to align with bodyFront.
Print the Stand
*Pirnt the stand Base, Support, and 2 support arms.Glue the 3 legs to the base.glue the support arms to the top of the support, with arms extended facing the central support leg. *
REVIEWS & COMMENTS
accuracy, and usability.


