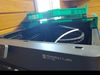
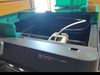
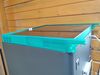
- Allows lid to slide open and close.
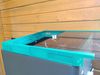
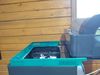
- Raises lid 36mm, increasing clearance for bowden tube.
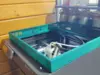
- Eight corner vents with sliding covers.
- Fits around top frame of printer with tabs on underside to hold securely in place.
- All parts 3D printed, no bolts etc required.
Supports are needed
Print 1 copy of each frame edge.
8 vent covers. 1 - 4 connection pieces depending on preference (with the lid in place the connection pieces are optional on all but front seam).
To assemble:1) Make sure all support material has been removed.2) Slide vents into each corner section. 3) Slide shorter connection slide into one of the front corners, so it in track that will be along the front edge of printer. (optional you can install connection slide for the other 3 joints as well).4) Remove printers glass lid setting it on secure surface.5) Install both rear frame edges around the tip on top of the printer (see pictures).6) Now slide the glass lid from the front into the track formed by the rear frame edges. Slide the lid back far enough to allow installation of the other frame edges.7) Install the two front corner edges.8) Install the center front edge and center the connection slide across it for added support.