1/70
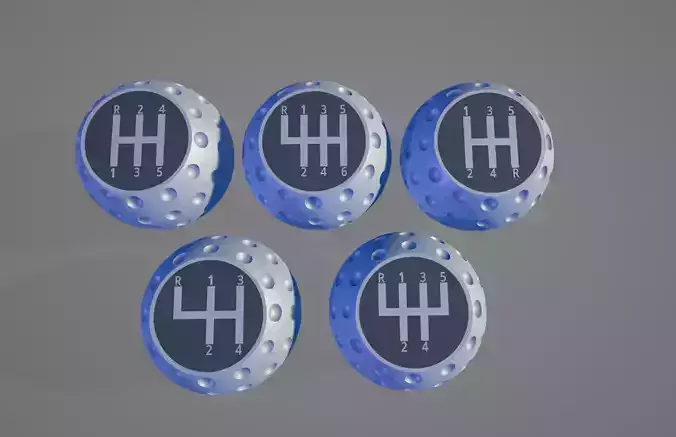
Elevate your vehicle or simulator setup with this complete bundle of five upgraded golfball-style shift knobs, engineered for 3D printing and digital fabrication in multiple formats (STL, OBJ, GLB, SVG).
Building on the original one-piece design, this modular edition separates the main knob body from the gear-pattern insert, enabling multimaterial printing and unique customization. Each knob retains the retro golfball-inspired dimpled texture for enhanced grip, while the detachable insert features one of five authentic gear layouts. Inserts are press-fit and bonded with adhesive, ensuring a flush, durable finish.
Designed for both real cars and sim racing setups, this bundle offers maximum versatility, realism, and personalization.
Technical Specifications (applies to all knobs)
Knob diameter: 46 mm
Total height: 46 mm (36 mm visible + 10 mm mounting zone)
Gear-pattern insert cavity: Ø29.1 mm × 5.10 mm (press-fit + adhesive)
Gear-pattern insert piece: Ø29.0 mm × 5.10 mm
Variants included:
M10 edition: Ø12 mm × 25 mm cavity (for M10 × 1.5 thread inserts)
M12 edition: Ø14 mm × 25 mm cavity (for M12 × 1.75 thread inserts)
Mounting system: Epoxy-glued metal thread insert (not included)
Insert attachment: Press-fit + adhesive for secure bonding
Printer compatibility: FDM printers using PLA, PETG, ABS, Carbon Fiber Composite Filament, etc.
Print orientation: Optimized for minimal or no supports.
Bundle contents4-speed classic – reverse top-left
5-speed standard – reverse top-left
5-speed bottom-right – reverse below 5th gear
5-speed dog-leg – reverse top-left, first gear offset
6-speed modern – reverse top-left
Assembly Instructions (for each knob)
- Prepare the parts
Print the shift knob according to thread size required (M10 or M12 edition).
Print the gear-pattern insert (Ø29 mm).
Prepare the metal thread insert (bushing), cleaned and ready.
Remove support material and check tolerances.
- Install the metal thread insert (not included)
Apply epoxy around the outer surface of the metal insert.
Press-fit into the knob cavity until fully seated.
Allow adhesive to cure per manufacturer instructions.
- Attach the gear-pattern insert
Apply cyanoacrylate gel or epoxy inside the Ø29.1 mm cavity.
Align and press-fit the Ø29.0 mm insert until flush.
Hold light pressure for 30–60 seconds and clean excess adhesive.
- Final installation
Once cured, screw the knob onto your gear lever (M10 or M12 thread).
Verify tightness and alignment before use.
- Optional enhancement
Insert sits ~0.1 mm below the knob surface.
Apply a transparent epoxy layer (~0.1 mm) to:
Fill tolerance for a flush finish
Protect engraving from wear
Add a glossy, premium look
Notes:
Metal threaded insert not included. Use strong epoxy adhesive for mounting.
Each knob in the bundle comes with its corresponding insert design.
All five knobs share the same body geometry and insert dimensions for consistency.
REVIEWS & COMMENTS
accuracy, and usability.


