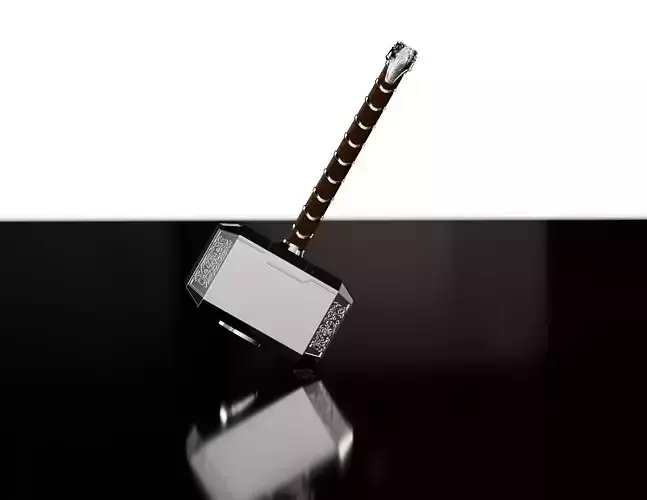
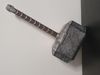
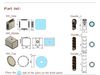
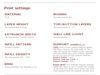
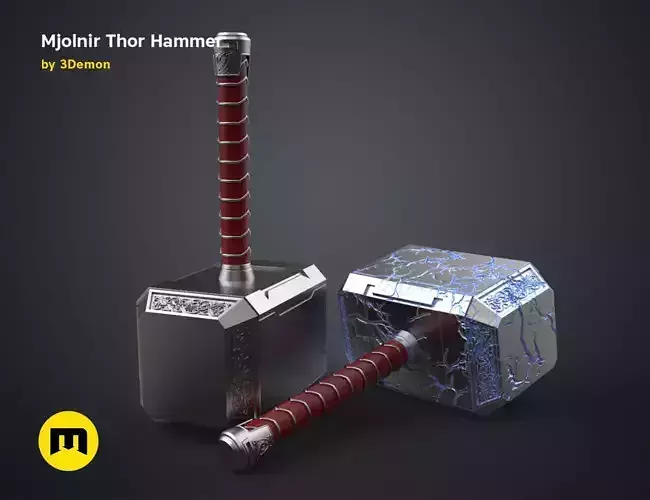
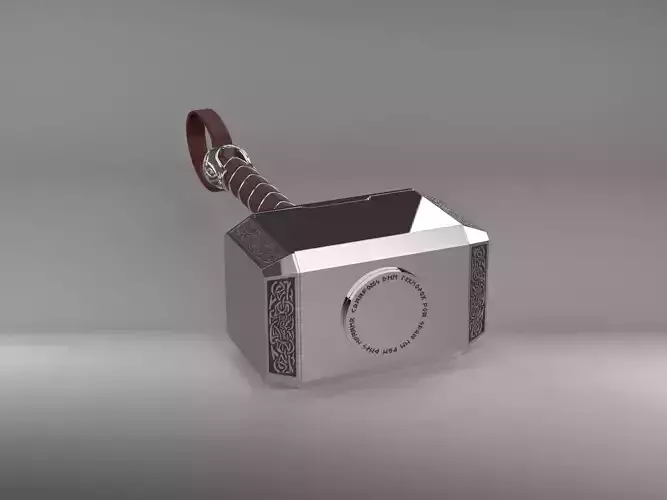
Hello my friend! I would like to introduce you to my version of Mjolnir which I designed to make printing and post-processing the hammer as simple as possible.Since I haven't found a model that doesn't require a lot of post-processing time, I created my own version which I am now sharing with you.During the design process, I aimed to minimize the need for support while maintaining quality and accuracy.To make printing more comfortable, I divided the model into 7 pieces, ensuring that the joints are as inconspicuous as possible, so there's no need for proper filler.The handle consists of 3 pieces (Handle_1,2,3) which allow printing on smaller printers as well.The hammer head is made up of 4 pieces (HH_cap, HH_middle, HH_side 2x) which also fit on a smaller printer such as an Ender 2.During the design, a 20mm⌀ x 433mm pipe was placed inside the hammer. When assembling, it is recommended to place the pipe inside for added rigidity.Any type of pipe can be used, but PVC is the cheapest and works perfectly.I worked with a tolerance limit of 0.1mm when fitting the pieces together, so there should be no problem assembling them with a well-calibrated printer.It is recommended to work separately on the handle and the head until the post-processing is complete.I suggest threading the PVC pipe through the HH_Middle piece, gluing the bottom of the HH_Cap piece, and about 145mm of the inserted pipe together. Then compress and hold it in place until the glue sets.Afterward, glue the HH_Side pieces on either side. Post-processing begins with sanding to remove the layer lines.It is worth using sandpaper with different coarseness (100, 200, 300, 400).For an even smoother surface, spray it with filler and sand it again while wet (between 600-1200 grit).Before painting the final color, it is recommended to apply a black primer layer for a metallic effect.(To ensure paint adhesion, it is also worth sanding it slightly under water with around 1000 grit paper).Paint the hammer head, rings on the handle, and decorative end of the handle with silver, and the handle itself with brown.You can shade, wear and tear it as you like.After painting, it is recommended to apply a clear coat for durability.Once the clear coat has dried (at least 24 hours), glue the handle pieces together with the hammer head and PVC pipe.