1/7
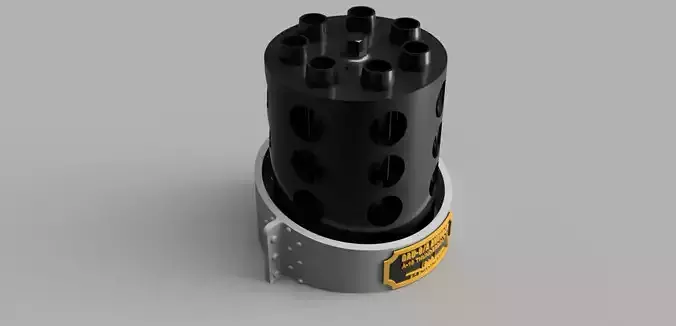
The GAU-8 Avenger Static Display will ensure that you establish and maintain office superiority! This is an accurate 1:1 Scale replica of the GAU-8 Avenger. Precise measurements were taken from the A-10 itself.
The GAU-8 Avenger is used exclusively by the United States Air Force A-10 Thunderbolt II, a dedicated Close Air Support aircraft that has been in service since 1977. The Avenger fires a mix of 30mm electrically primed PGU-13/B High Explosive Incendiary (HEI) rounds and PGU-14/B Armor Piercing Incendiary (API) rounds. While the HEI rounds provide the Avenger the ability to destroy light skinned vehicles, the weapon's real punch is delivered by the API rounds, each of which incorporates over half a pound of super-dense Depleted Uranium. At 1,200 meters (4,000 feet) a 2-second burst from the AN/GAU-8 will deliver 100 rounds containing 65 pounds of DU and place 80 percent of these projectiles within 20 feet of the target. (military.com)
If you think that's impressive, think of what it can do for your office space.
The stand replicates the interface between the GAU-8 and the A-10.
The plaque is designed to be printed flat (providing the ability to cleanly print in two colors) then thermally molded to the surface of the base/stand. I achieved this by FIRST printing the base, then printing the plaque flat, then carefully heating the plaque using a heat gun, and finally manually forming the plaque to the base. If you have trouble with this method, I have included a curved plaque file that fits the radius of the base/stand. Once at the correct radius, glue the plaque to the base/stand.
The body is designed to be printed in a single piece with no supports. I added fillets to the top and bottom interior surfaces of the main enclosed cylinder to make it easer for a printer to bridge. I have added two additional Body files, Body SplitA and Body SplitB, for your printing convenience (intended to replace Body Solid. This will allow for printing the main cylinder structure with a central support that is easily removable. After printing both parts, they will need to be bonded. This will create a seam, but it will be hidden within the base.
I also sell a 1:2 Scale replica of the same model, altered to faithfully serve as a pencil holder!
Print Settings (what worked for me, adjust as you see fit):Resolution: 0.1 - 0.2Supports: NOInfill: 5% - 10%Base Filament: Cool Grey, PLABody Filament: Black, PLAPlaque Filament: pt1(black, pla); pt2(gold, pla)
REVIEWS & COMMENTS
accuracy, and usability.


