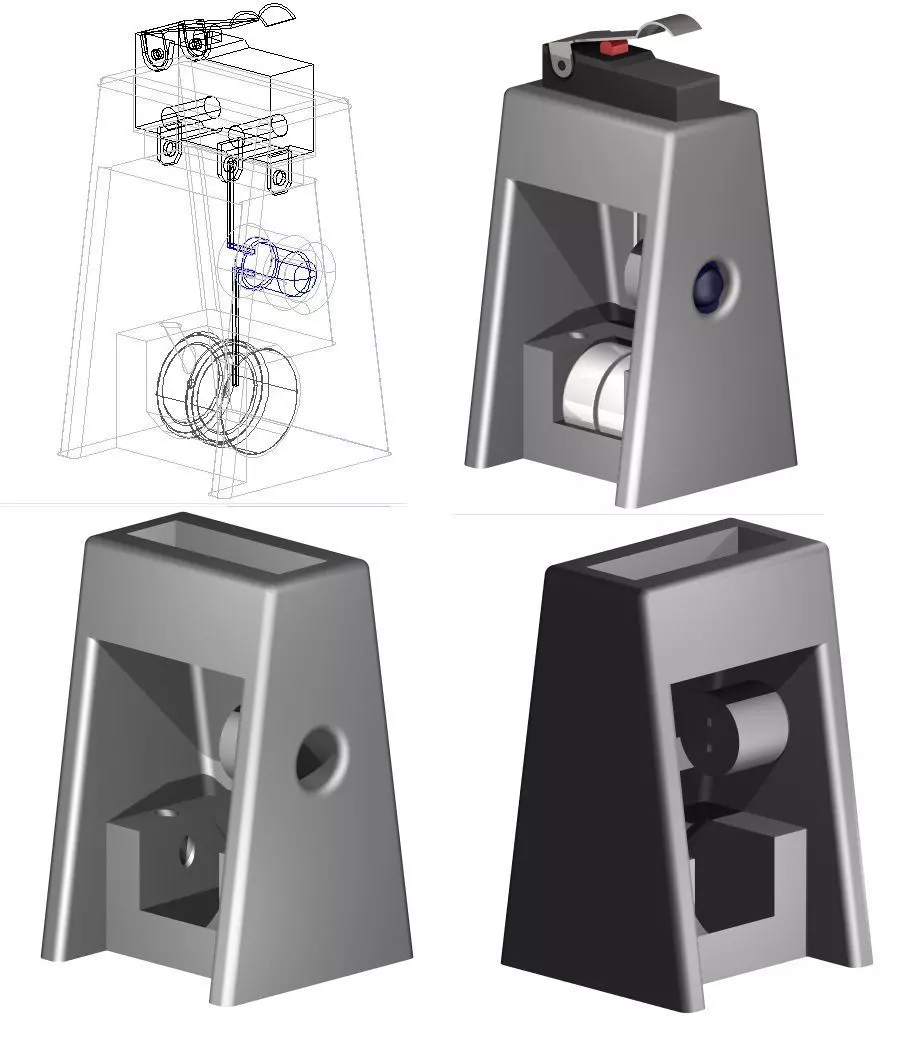
This is an X-Axis gantry bed leveler, the first of its kind.We level all printers as if everything is properly assembled, tightened, and adjusted. The relationship between the nozzle height and Gantry height is considered not to change, thus leveling only one corner and the rest means that we must hope to approximate the amount of drag the nozzle has against each corner and assume we did a good job. this removes this variable as all corners are now leveled against the first, accurately and mechanically, not according to the memory of a touch.
A sacrificial 0.2mm layer is under the switch mount for support-free printing.You will need
- Standard LED of your color choice
- A small bit of wire @ 1.5 inches long
- 2x LR44 (AG13 357) button batteries
- 1 standard 3D printer end stop switch, with to without metal arm
How to use.
- With any adjustable bed, use the standard paper drag method on the front right corner and only get the other adjusters visually close.
- Raise the Gantry to app'x 55 mm
- Move the hotend to the center of the gantry
- Place this leveling assistant so that the red button or the metal arm (if used) is directly over the leveling screw of the corner you just leveled.
- Slowly lower the gantry by hand or via the machine's control (by hand is able to get more accuracy if your machine only lowers by 0.1 increments) until the switch clicks and the LED turns on
- Slowly raise the gantry and repeat to verify
- After verifying, DO NOT MOVE THE Z AXIS !
- Move the sensor to the top of other corner leveling screw.
- Raise, slowly (via the leveling knob or wheel) the bed until the switch clicks and the LED is on. Repeat to verify.
- Without moving the Gantry, move the Y Axis so that its adjustment screws are directly below the gantry and proceed to follow the same procedure to level the back corners of the bed.
IT IS IIMPORTANT TO NOTE THAT BATTERIES AND THE LED ARE OPTIONAL, AS THE AUDIO SOUND OF THE SWITCH CLICKING IS SUFFICIENT TO SIGNAL YOU TO STOP ADJUSTING. Either the light signal or the click will signal the same position.
While the bed should be very level, you may repeat the process one more time to verify the accuracy, just like with paper leveling all four corners, but following the method, without variation, as stated above.